• Home
  • MGM’s Photos
    • Fashion/Glamour
    • Nudes
    • Street
  • Shoutouts
  • Reviews
  • Interviews
  • Commentary
  • About
  • Contact

Michael Grace-Martin

~ Photography, Art & Life

Michael Grace-Martin

Category Archives: Wedding

Wedding Photographer Dilemma

12 Wednesday Oct 2011

Posted by mgm in All, Commentary, Wedding

≈ Comments Off on Wedding Photographer Dilemma

Share

Becoming a (relatively) high-paid wedding photographer is a tricky thing. To charge high prices, you have to be a bit of a egotist to believe you’re worth the higher prices when there’s so much lower priced competition out there. However, once you’re at the wedding, you have to toss that egotism out the window because people are going to be asking you to do all sorts of things, to the point of practically ordering you around….and you’d better take it in good spirit or you won’t last long as a wedding photographer.

Ultimately, you need to fully embrace the *utility* nature of wedding photography, while marketing yourself as an “artiste”. Letting either of the personas come out in the opposite context is a recipe for disaster.


Visit Michael's Art Photography Portfolio at SaatchiArt.com!

Point-and-Shoot Wedding: Photographing a Wedding with a Compact Digital Camera

29 Thursday Sep 2011

Posted by mgm in All, Commentary, MGM's Photos, Wedding

≈ 4 Comments

Tags

candid, event, photographer, photography, wedding

Share

I am a professional event photographer and I own thousands of dollars worth of professional digital camera equipment. I have photographed many events with my “high-end” photography equipment. When I’m not photographing events as a hired professional, I often use much smaller and less expensive cameras (both digital and film) to capture photos. I have been impressed with the quality of the images I been able to get with my smaller, less expensive cameras. The images don’t have quite the resolution or color depth of the files I get from my high-end, professional equipment, but in many cases I’ve found they’re pretty darn good…and often good enough for their usual uses–e.g., to display on web pages, make smallish prints (up to 8×10), or to make photo books.

As long as the subject matter isn’t fast-moving (e.g., sports) or ensconced within a large, dark interior space (e.g., big, dark reception halls at night), using a non-DSLR camera with a small sensor can perform reasonably well.

So, it’s always been a fantasy of mine to photograph a wedding with a compact, “point-and-shoot” digital camera and see what I could get.

You might ask, “Why would a professional photographer want to show that a wedding could be acceptably photographed with an inexpensive camera when part of what his/her clients are paying for is that expensive, high-end equipment that mere ‘mortals’ can’t afford?”. The high-end equipment provides something extra for your money, no doubt. I most certainly get shots with that pro equipment that I can’t get with a compact camera; I am not disputing this.

However, I think that a truly experienced and professionally skilled wedding photographer *should* be able to get good shots even with decent but much less expensive non-professional digital camera equipment–i.e., it should be more about the photographer’s eye and skills than about the equipment they’re using.

I suppose the purpose of this article is two-fold: 1) as a response to the hegemony of the camera companies–and the people who eat up their message–that you need (and need to keep buying) the latest and greatest camera equipment to produce good photos at events like weddings, and 2) to reiterate the message: “It’s the photographer that makes the great images, not the equipment”.

A good photographer who really knows his/her equipment knows how to get the camera to make great images. A photographer can have a great/expensive camera + lenses + accessories and still make lousy images. Successful photography is all about the photographer and how well s/he knows how to use her/his camera equipment. The message here is not original with me; but I find it helpful to prove things for myself.

So, on with my “story”…

I had been looking for a wedding I could photograph in which: a) the wedding couple wasn’t going to have a wedding photographer, so they’d be grateful for any wedding photos I could give them (assuming I didn’t charge them or charged them very little), or b) be a free “extra” photographer in combination with the paid lead photographer. In either case, if my point-and-shoot photos didn’t come out well, no huge loss would be incurred.

Well, I found a wedding with a paid lead photographer. There was also a second person (who owned the venue) taking photos with professional quality DSLR equipment. Then there was me with my compact camera with a built-in zoom lens…much like any wedding guest might have. In fact–with the permission of the wedding couple–I posed as just another wedding guest with a camera. So, really, this “experiment” had two facets: 1) taking photos with a compact digital camera like any guest might have, and 2) taking photos while not being in the obvious role of a paid professional photographer.

As it turned out, a number of factors were operating against me:

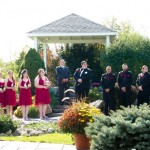
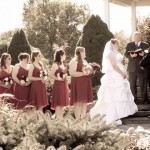
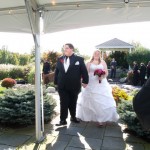
1) Even though wedding guests–especially ones with expensive DSLRs–will sometimes get out of their seats at ceremonies to take photos, I vowed to stay in my seat with the point-and-shoot guests because that’s more typical behavior for a guest with a camera and I was trying to be convincing in my “wedding guest” role. Also, with two other photographers roving around taking photos during the ceremony, I’m sure they didn’t need me getting in the way (this, of course, is my ideal notion of the thought process of wedding guests at weddings that *I’m* paid to photograph!…but I digress..). So, I took all my ceremony photos from an aisle seat.

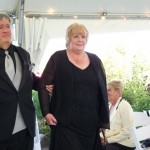
2) Taking photos of people other than: the bride and groom, their parents, or the wedding party (who are always “fair game”) was somewhat awkward because, “Who the hell is this other guest–who I don’t know–taking a photo of me when I’m not in the wedding?!”. I tried to sneak in photos of other guests, but it was a little tricky.

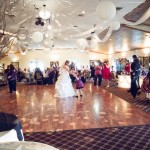
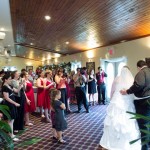
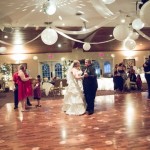
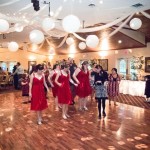
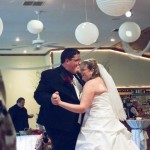
3) During the introductions and first dance, I stayed at my table with the other guests. Again, I was trying not to stand out too much as “Mr Photographer Guy”. So, instead of getting typical first dance photos, you get the perspective of a guest seated a couple tables away from the dance floor. I actually found this “guest” perspective of the dance interesting and fun.

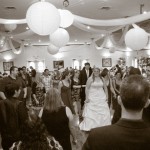
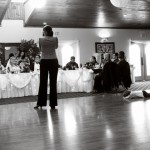
4) In trying to stay out of the way of the first and second photographers, I had to “hang back” a lot and also get alternate perspectives on things. So, during the toasts, I took in a wider perspective…sometimes with the other photographers in the shot. During the cake cutting, I was initially behind the wedding couple–because the other two photographers were in the front–taking shots of the crowd surrounding them (a perspective I don’t normally get as a lead photographer, though it’s a nice perspective to have!).

5) And finally, the small sensor on my camera was fine when we were outdoors, and even indoors before it started getting dark. But once it got darker, I was struggling with existing light shots (which I tend to prefer). At some point in the evening, I started using a hot shoe flash on my compact camera, aiming the flash toward the ceiling. When I was close enough to the subject, it worked reasonably well. It’s a pretty small flash, though, and I struggled to get anything farther than 10-15 feet away (something I can do with my big, expensive DSLR equipment). I still took *some* existing light shots so I could capture some of the ambient lighting; if you don’t mind a little digital noise, they’re not bad.

So, what do I conclude from this little “experiment”?

I was able to get many–though not all–of the images I wanted to get. I was talking to the lead photographer at the wedding (briefly, so as not to compromise my wedding guest “confederate” status) and mentioned that I felt I was getting something like 80% or so of the images I could get with my much more expensive professional camera equipment. Is that missing 15-20% crucial? Maybe, maybe not.

This was not a true “pure” test of the compact camera versus the professional DSLR. I was limited in various ways due to the presence of the other two photographers and my ruse of trying to appear as just another wedding guest (I even had a “story” of how I knew the wedding couple in case any of the other guests asked…:-). On the other side, it certainly helped to have a wedding during the day, outside under a tent where the light is pretty good. I would have struggled much more with a compact camera in a dark church.

I guess the main message for me is that it *is* possible to get nice wedding images with a compact camera–even in the role of a “guest”. The important thing is for the photographer to really know what s/he is doing–having lots of experience shooting weddings and/or other events helps a lot!–and for the photographer to really know the strengths and weaknesses of the camera they’re using.

Also, I would be remiss if I didn’t mention one other thing: knowing how to process images (in something like Adobe Lightroom or Photoshop) can make a *huge* difference in the final appearance of your images regardless of your camera equipment. What makes a wedding image look like a “wedding image”? A significant part of this “look” is the post-event image processing.

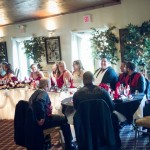
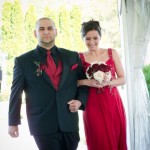
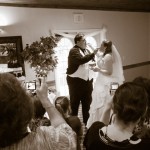
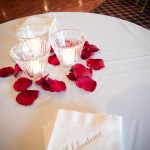
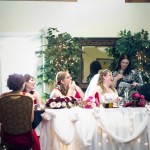
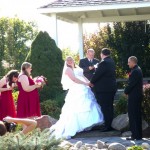
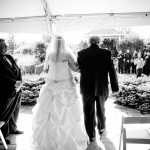
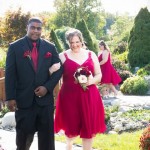
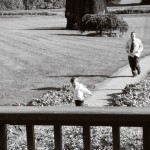
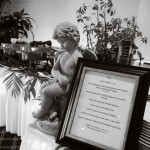
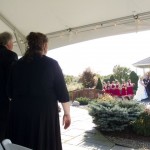
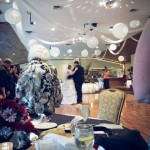
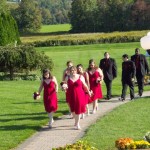
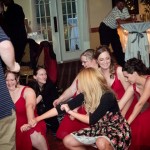
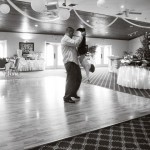
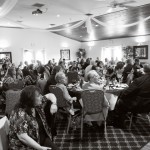
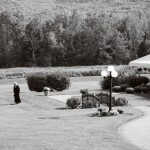
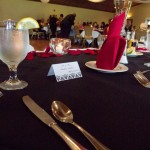
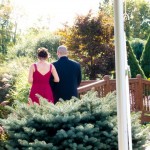
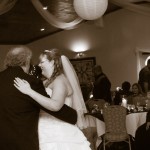
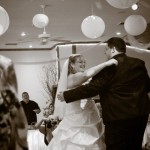
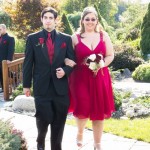
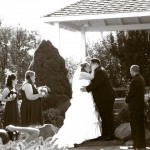
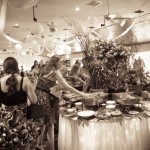
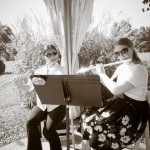
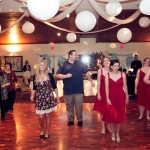
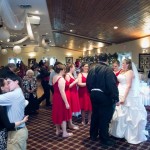
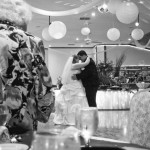
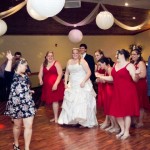
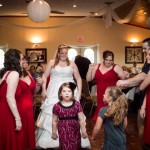
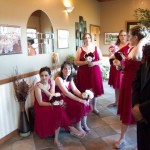
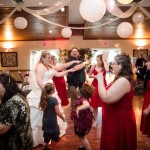
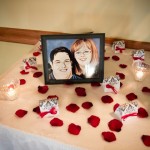
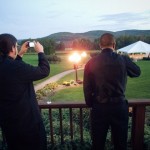
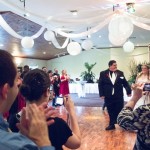
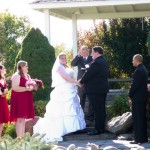
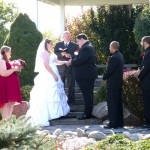
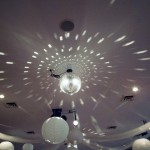
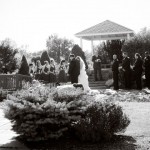
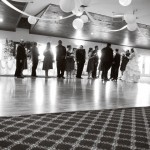
Below, you can see a bunch of the wedding images I took with my point-and-shoot at the wedding and decide for yourself how “successful” the experiment was..!

Point-and-Shoot Wedding

Point-and-Shoot Wedding

Point-and-Shoot Wedding

Point-and-Shoot Wedding

Point-and-Shoot Wedding

Point-and-Shoot Wedding

Point-and-Shoot Wedding

Point-and-Shoot Wedding

Point-and-Shoot Wedding

Point-and-Shoot Wedding

Point-and-Shoot Wedding

Point-and-Shoot Wedding

Point-and-Shoot Wedding

Point-and-Shoot Wedding

Point-and-Shoot Wedding

Point-and-Shoot Wedding

Point-and-Shoot Wedding

Point-and-Shoot Wedding

Point-and-Shoot Wedding

Point-and-Shoot Wedding

Point-and-Shoot Wedding

Point-and-Shoot Wedding

Point-and-Shoot Wedding

Point-and-Shoot Wedding

Point-and-Shoot Wedding


Visit Michael's Art Photography Portfolio at SaatchiArt.com!

Choosing Lenses for Wedding Photography: Specific Recommendations

05 Wednesday May 2010

Posted by mgm in Wedding

≈ Comments Off on Choosing Lenses for Wedding Photography: Specific Recommendations

Share

There seems to be a lot of interest in choosing lenses for wedding photography. I am asked this question by colleagues and I’ve noticed a number of people come to this blog looking for this information.

I addressed this question in a previous post, but I would like to list specific recommendations based on the camera or cameras you own. Unfortunately, I will only be doing this for Canon DSLR equipment, because that’s what I own and am most familiar with. If you’re a Nikon (or some other brand) camera user, you may still be able to find and use the equivalent lenses that apply to your camera.

When I think about lenses for wedding photography, I like to break the typical wedding day up into the separate stages: i.e., getting ready, pre-ceremony, ceremony, post-ceremony, group formals, and reception (I sometimes further break reception down into early and late). Also, it makes a difference whether the ceremony and/or reception is indoors or outdoors.

As I start composing this post, I realize there are a *lot* of considerations I could list based on the specific circumstances of the particular wedding you’re shooting. But I don’t have the time to write “that” tome right now (maybe an e-book later on??).

So, I’ll go with a more general guideline sort of post.

Outdoor Ceremony and Reception
If it’s an outdoor ceremony and reception, and you’re not taking any “getting ready” shots, this is the easiest scenario there is. You just need a good quality zoom lens and it doesn’t have to be particularly fast (i.e., it doesn’t have to have a large maximum aperture). If you’re using two cameras and one of them is a full-frame (e.g., a Canon 5D), put a 24-105 f/4 IS on the full-frame camera and a 70-200 f/4 (IS or non-IS) on the other camera and you’ve got great outdoor coverage!

If you’re looking for an inexpensive combination that still gives decent quality, using a 18-55 IS and a 55-250 IS lens (these are inexpensive, but good quality plastic EF-S lenses) on one or two Digital Rebels or Canon 20D/30D/40D/50D series cameras (these are all 1.6x crop factor cameras) can work quite well.

Indoor Getting Ready & Pre-Ceremony
Once we move indoors, I find it necessary to have at least f/2.8 constant maximum aperture lenses. Also, you want to be able to go quite wide (at least 24mm, full-frame equivalent). A 24-70 f/2.8 lens on a full-frame camera or the 17-55 f/2.8 IS lens on a 1.6x crop factor camera will cover these shots quite nicely. I’m particularly fond of the 16-35 f/2.8 lens (on either a full-frame or 1.3x crop factor Canon 1D series camera), but then you’ll probably want to make sure you have a second camera with a lens somewhere in the 50 to 100mm range (e.g., a 85mm f/1.8).

Indoor Ceremony
You should be prepared for the indoor ceremony location to be dark. If isn’t, you’ll be fine with lenses that can handle a dark indoor setting. The reverse (being prepared for an indoor setting with ample light, but then finding out it isn’t so), can be quite problematic!

Now, indoor ceremonies can occur in anything from large, palatial churches to small conference-sized rooms. In almost any scenario, the 70-200 f/2.8 (IS or non-IS) lens is your friend! You’ll also want to get some wide shots with your 16-35 f/2.8, 24-70 f/2.8 or 17-55 f/2.8 IS lenses. I always shoot ceremonies with two cameras and two lenses. However, you could get away with just a 24-70 f/2.8 (on a full-frame camera) or a 17-55 f/2.8 IS (on a 1.6x crop factor camera) if the ceremony isn’t occurring in a huge indoor facility…*or* if you’re able to move around very freely without disturbing the wedding officiant or the rest of the ceremony audience.

Post-Ceremony (Indoor and Outdoor)
After the ceremony, there may be a receiving line; and this receiving line may or may not occur outdoors (depends on weather and the ceremony facility’s particular configuration). This is another case where it’s best to be prepared for low light conditions, though you may end up outdoors with great light. The lenses you used for the ceremony will usually work fine here.

Group Formals
The main consideration here is to be able to go quite wide in case you’re taking the formals in cramped quarters with a large group. You’re going to want to use a relative small aperture to keep everyone in focus; so a f/2.8 lens here isn’t necessary. However, since the formals often happen right after the ceremony, using the 16-35 f/2.8, 24-70 f/2.8, or 17-55 f/2.8 lens that is already on your camera should work quite well. (Note: the full-frame equivalency of 17mm on a 1.6x crop factor camera is 27.2mm; this may not be wide enough for the very largest group in a cramped indoor area. You may want to carry a very wide prime lens for such instances if you’re only working with 1.6x crop factor cameras.)

Indoor Reception
Indoor receptions tend to occur at night in dark rooms with low lighting. In addition, you’re often photographing people moving around (e.g., dancing) in this darkness! Until it gets truly dark at the reception (sometimes receptions begin with lots of light streaming in through windows or with all the lighting turned way up)–or if you don’t mind relying on flash or off-camera lighting–you can often get by with the lenses you used for the ceremony (i.e., 16-35 f/2.8, 24-70 f/2.8, 17-55 f/2.8, and/or 70-200 f/2.8).

Though I use flashes and off-camera lighting for some of my reception photos, I don’t like taking *all* of them with “superficial” lighting I have generated. As the evening wears on and it becomes totally dark outside, I take out some large maximum aperture prime lenses to capture some indoor, existing low light shots. There are many to choose from. Some typical choices: 24 f/1.4, 28 f/1.8, 35 f/1.4, 50 f/1.2 or f/1.4, 85 f/1.2 or f/1.8, 100 f/2, and 135 f/2, to name a few.

The *really* expensive lenses here ($1200 and more) are the 24 f/1.4, 35 f/1.4, 50 f/1.2 and 85 f/1.2. Personally, I hate having too much money wrapped up in one fixed focal length; there’s no one focal length that I use enough to justify the cost of these lenses. I think the 50 f/1.4 is a good buy and a good lens to have around. The other fast primes I listed are more affordable, but are a matter of personal choice.

Whichever fast prime lenses I decide on, I start putting on the camera as the reception wears on. I think it’s important to keep one relatively wide zoom lens around for any wide-angle photos you may need to take with flash or off-camera lighting, like the tossing of the bouquet across the width or length of the dance floor. I try to offload the 70-200 f/2.8 lens to my car if possible because who needs to be carrying around all that weight!

Overall Recommendations
If you’re like me, you own a bunch of these lenses and you choose a different combination to bring to each wedding, depending on the particular circumstances of that wedding. For me, my main challenge is to choose the most efficient combination of lenses for each wedding that allows me to take all the types of photos I’ll want to take without having *all* of my lenses with me!

Now, if you’ve got a limited budget for camera equipment to be used for photographing weddings (which even I have, but sometimes don’t admit to myself…;-), here’s what I would recommend buying:

1) You pretty much need one or two f/2.8 maximum aperture lenses, unless you *never* photograph indoor weddings.

If you’ve got a 1.6x Digital Rebel or 20D/30D/40D/50D series camera, buy the kinda expensive but high quality 17-55 f/2.8 IS lens. If you’ve got a 1.3x crop factor 1D series camera, buy the 16-35 f/2.8 lens. If you’ve got a full-frame 5D series or 1DS series camera, buy the old standby 24-70 f/2.8 lens. You can buy these used if you need to save money (I do this sometimes).

I really like the 70-200 f/2.8 IS lens, and would recommend you buy it whether you’ve got a full-frame, 1.3x, or 1.6x camera. However, this is an expensive lens. For a less expensive “work-around”, consider the 100 f/2 or 135 f/2 prime lenses to be your “go to” telephoto lenses. The 100 f/2 is cheaper and probably a better choice if you have a 1.6x crop factor camera (the full-frame equivalency is 160mm on a 1.6x camera).

2) Get the 50 f/1.4 prime lens. It’s the only f/1.4 lens you can get for under $1000 (it’s less than $400!). And it’s a very flexible focal length: it’s a “normal” lens on a full-frame camera, it’s the equivalent of 65mm on a 1.3x crop factor camera, and it’s equivalent to 80mm on a 1.6x crop factor camera.

With these 3 lenses and your 1-2 cameras, you can do a very nice job photographing most weddings, indoor or outdoor.

When/if you start to get more money to invest in lenses, you can start to branch out to some of these other potentially very useful lenses. For example, a good one for general outdoor, one camera use is the 24-105 f/4 IS L.

That’s it for now. Good luck!


Visit Michael's Art Photography Portfolio at SaatchiArt.com!

Choosing Lenses for Wedding Photography

01 Monday Feb 2010

Posted by mgm in Wedding

≈ 2 Comments

Share

Though I’ve certainly done a few blog posts regarding wedding photography with mentions of lens choices, I find myself having to re-visit the topic…especially now on the brink of another wedding season.

I recently got rid of one of my stalwart zoom lenses which I used since my very first wedding: the Canon 24-70 f/2.8 L USM. Recently I concluded that all zoom lenses are compromises and “crutches”, and that I happily accept and use them anyway. However–to me–the 24-70 became the ultimate in non-committal compromise. It can’t really reach into those breathtaking or highly useful (in tight quarters) wide angle shots I can get with a fisheye or 16-35 zoom lens, and neither can it zoom in very well for those intimately tight close-ups that I get with my 135 f/2 or my 70-200 zoom lens. If I want to go with a “play it safe” middle range, I’d rather put on a standard normal lens (50mm) with a larger maximum aperture (f/1.4 or f/1.2) so I can take photos in almost any lighting condition.

As I’ve mentioned before, if Canon (or anyone else) made a super zoom lens with a constant large maximum aperture, decent optical quality, and it didn’t weigh 10 pounds, that’s the lens I would use; I’m not particularly fond of constantly changing lenses *especially* when it leads to missed shots and dust and dirt getting into my camera body. But this is not the way things are, and camera equipment manufacturers aren’t highly motivated to make and sell you a single product that takes care of all your photographic needs when they can sell you a dizzying array of products, each one of which only partially takes care of your needs.

Some may say it’s physically impossible to create the one-lens-does-it-all lens I allude to. I’m not saying it would be easy, but I think technology can accomplish an amazing number of things when the needed accompanying motivation exists.

But enough talk of this “super lens”, let’s get back to current reality because that’s what I have available to me for my upcoming “real” weddings in 2010…(!)

I will have three cameras available to me this wedding season: one with a full-frame sensor (Canon 5D series), one with a 1.3 crop sensor (Canon 1D series), and one with a 1.6 crop sensor. For weddings, I nearly always have two cameras readily available (i.e., hanging on me in some way) with lenses attached.

One thing I like about having cameras with different size sensors is that it effectively turns each of my lenses into the equivalent of *three* lenses. For example, on my full-frame sensor camera, a 50mm lens has the FOV (field of view) of a 50mm lens (of course). On my 1.3 crop sensor camera, the 50mm lens has the FOV of a 65mm lens. And on the 1.6 crop sensor camera, that same 50mm lens has a FOV of a 80mm lens. Since you’re going to need a backup camera for wedding photography anyway, choosing cameras with different size sensors gives you more versatility with your existing lenses. (Note: make sure you buy lenses that can work on all three camera bodies or this advantage won’t be there.)

When it comes down to the choice of prime lenses versus zoom lenses for wedding photography, I’ve developed a few guidelines for myself:

  1. The highest priced professional quality zoom lenses yield images that are absolutely good enough for wedding clients. To buy multiple primes instead of these high quality zoom lenses for better image quality will make no difference to 98% of your wedding clients. They are *much* more likely to notice how you framed your shots (e.g., how you were able to zoom in or zoom out for a shot) than to notice that a prime lens yielded marginally better detail or BOKEH than a zoom lens.
  2. With the high ISO capabilities of current digital SLRs, there are many fewer instances when you need a lens with a larger maximum aperture than the f/2.8 available with most top quality professional zoom lenses for existing light shots. And for those instances when f/2.8 isn’t large enough for an existing light shot (e.g., due to your subject moving in a low light situation), you can:
    • use a bounced or diffused flash to raise the ambient light,
    • keep one large aperture, “general purpose” prime lens in your camera bag to take out and use during these moments, or
    • trigger some off-camera lighting.
  3. Most wedding clients like *both* intimate close-up shots (e.g., facial expressions during key moments during the wedding day) and scene-setting, wide angle shots (e.g., the wedding couple standing at the front of a high-ceiling church, or all the bridesmaids crammed into a tight dressing at various stages of getting ready).
  4. My lens strategy for an outdoor wedding ceremony and/or reception versus an indoor one is quite different and usually requires no prime lenses. In general, outdoor ceremonies and receptions are significantly easier to photograph because there’s usually much more light to work with. With more light, I can use one of my smaller maximum aperture zoom lenses that covers a much larger focal range (e.g., I have a 24-105 f/4L and a 35-350 f/3.5-5.6L). I bring a flash, but mostly just for some fill light.

So, what about my *indoor* wedding lens strategy for 2010?

  • Wide-angle zoom: 16-35 f/2.8–this gives me a true 16-35mm on the full-frame camera and 20.8-45.5mm on the 1.3 crop sensor 1D. So, this lens in conjunction with these two cameras give me 16-45.5mm f/2.8 (i.e., super wide up to almost normal) coverage.
  • Middle range prime: 50 f/1.4–this gives me “normal” coverage on the full-frame and 65mm (somewhat telephoto compared to normal) on the 1.3 crop sensor 1D. F/1.4 is a very useful large aperture to have available and the Canon 50 f/1.4 is the least expensive, high-quality f/1.4 lens Canon makes.
  • Telephoto zoom: 70-200 f/2.8–a true 70-200mm on the full-frame and a somewhat more telephoto (91-260mm) on the 1.3 crop sensor 1D. For even closer crops, I can put it on the 1.6 crop sensor camera for an effective 112-320mm reach.
  • Dark/Late night prime: 135 f/2–I often swap the 70-200 f/2.8 for a 135 f/2 later in the reception when/if it becomes too dark to use the 70-200 without auxiliary lighting.

So, at this moment in time (1:00pm on a Monday, 2/1/2010…;-), this is my lens strategy for the 2010 indoor wedding season. Whew! It’s a bit of a relief to me (I’m constantly mulling this stuff over and trying it out at weddings) and I hope you can gain something from my “suffering” as well…;-).


Visit Michael's Art Photography Portfolio at SaatchiArt.com!

Weddings, Existing Light, and Authenticity

23 Wednesday Dec 2009

Posted by mgm in Wedding

≈ Comments Off on Weddings, Existing Light, and Authenticity

Share

So, I fell *way* behind in my 2009 wedding blog postings! I photographed many great weddings in 2009, so I thought I should finally put up some of my favorites from the 2009 wedding season…:-).

Before I do that, however, I wanted to mention that I’m really looking forward to the 2010 wedding season. Why? Well, I sold off a bunch of my camera equipment in order to purchase two new pieces of equipment for 2010:

  1. The new $5000 Canon 1D Mark IV digital SLR camera, which promises to be the best low-light professional digital camera Canon has *ever* made
  2. A Canon 35mm f/1.4L lens…one of the best quality, low light lenses Canon has ever made

You may be noticing a theme here: Michael is really interested in camera equipment that takes great photos in low lighting. Yes!

I’ve gotten *much* better at using flash photography than when I started photographing weddings 4 years ago. I’ve also gotten quite good at using remote flashes in dark reception halls. This is all well and good and as it should be for a professional wedding photographer. The thing is, I still prefer making photos in existing light when possible.

“Existing light” is the lighting the wedding participants are actually experiencing at the ceremony and reception. When I go and trigger a flash–either one attached to the camera or a remote flash not attached to the camera–I am altering the lighting and changing the ambience or “atmosphere”, or whatever you want to call it. Also, those bright lights going off in people’s faces is quite likely altering their behavior.

Here, I think, we encounter a philosophical question: Is the goal of wedding photography to capture things as “authentically” as possible? Or is the goal to make things as easily seen as possible? I should note that the goal of making the event and the people involved look as good as possible isn’t exclusive to either of these. This latter goal may, in fact, require a mixed bag of lighting techniques, including simply using existing light.

To be totally honest, I’m usually trying for either authenticity or beauty, and am quite happy when I accomplish both simultaneously. With the exception of a short portrait session I sometimes do with the wedding couple on their wedding day, I very seldom go that extra step toward beauty (or “eye candy”) over authenticity and stage a bunch of shots where I’m dictating poses, actions, and lighting. This is not the way of wedding photojournalism and I am, in fact, primarily photojournalistic in my approach.

A camera like the Canon 1D Mark IV combined with a lens like the Canon 35mm f/1.4L gives the photographer the ability to capture images regardless of lighting conditions or movement in the image. This is Canon’s fastest focusing camera (the 1D series has always been a top-choice of sports photographers) with the highest light sensitivity of any camera made. Sure, I will still have a flash attached to it; but *using* that flash will become much more of an option than with any previous camera.

The light at the church or reception hall–or the lack thereof–will cease to be the overriding determinant of the lighting techniques I must use to capture photos. This camera plus the large aperture of the 35mm f/1.4L lens will keep lighting options open and let my sense of authenticity and/or artistry lead the way instead…:-).

Now for those 2009 Wedding Photos…

Okay, so I ended up with a *bunch* of choices from the first wedding I looked at from early in the year! I’ll have to follow-up this post with a few more in order to cover more of my 2009 weddings…:p. By the way, thanks Rachel and Stephen…:-).


Visit Michael's Art Photography Portfolio at SaatchiArt.com!

Physical Fitness and Equipment Strategies for Wedding Photography

01 Tuesday Dec 2009

Posted by mgm in Wedding

≈ 1 Comment

Share

Photography, especially photojournalistic wedding photography, requires a significant amount of physical stamina and prowess.

This past wedding season, I was somewhat plagued with back problems. It was fairly evident that carrying 2-3 cameras–as I had been the previous season–was taking its toll on my back.

Why hadn’t I had these back problems the previous wedding season? Of course, I was one year older and I could have blamed it on age. One more year added to my 40+ year old body, though, shouldn’t have made *that* huge a difference!

I think the more likely cause was that early in 2009, my home workout equipment broke down and I didn’t replace it. I still exercised *some*, but definitely at a reduced level.

The physical strength and stamina that had easily carried me through 8-10+ hour long wedding days was waning toward the end of weddings. I was experiencing physical and emotional/mental lows during receptions. And halfway through the wedding season, my lower back went out and made weddings even more physically grueling.

Instead of going right out and replacing my exercise equipment at that point (partially because I didn’t attribute my physical problems to reduced physical stamina and strength), I tried taking one of the cameras off my shoulders and sticking it into a “holster” on my belt (I have this padded belt to which I can fasten pouches and cases to hold lenses).

Getting this weight off of my shoulders helped significantly. It worked great for the two weddings I did right after my back went out. At the very next wedding, however, I had problems with the camera falling out of the holster; it happened 3 times…once on the concrete right in front of the hotel where the bride was getting ready! Luckily, the camera and lenses survived the three falls.

Well, that was near the end of the wedding season and I never did find a good solution to having the second camera on my belt. (I’ve since heard of fellow wedding photographer in my area coming up with a novel solution to this problem which I hope to learn more about and perhaps report on in a future blog post.)

Even if I do find a good solution, having too much equipment hanging at your waist–even while much easier on the back–makes you “wider” and less able to get around crowded reception rooms without banging your camera or lenses into the wedding guests seated and standing around the reception room!

So, why don’t I just eschew the 2-3 cameras and carry only one?! For the very reason I worked up to carrying 2-3 around in the first place!–to cover wide, normal, and telephoto ranges simultaneously with high-quality constant f/2.8 zoom lenses and prime lenses.

Ever notice that no high-quality constant f/2.8 zoom lens–or even a constant f/4 zoom lens–covers the whole gamut?? Sure, there are consumer grade zoom lenses with variable, smaller than f/2.8 maximum apertures that can cover the equivalent of 28 or 24mm to 200 or 300mm (35mm full-frame equivalent). But the combination of their lower quality optics, slower autofocusing, and smaller maximum apertures makes them inadequate for non-flash indoor wedding photography in those all-too-common dark churches and reception halls…and I *like* to photograph as much as I can without flash, or at least without direct flash.

Even the Canon 28-300mm f/3.5-5.6L IS, although professional “L” grade, doesn’t engage full operation of Canon’s higher end DSLR autofocusing systems…*that* is reserved for lenses with f/2.8 maximum apertures and larger. So, this lens may be okay for outdoor weddings; but you need all the help you can get for lowly lit indoor affairs!

Ultimately, then, you’ve got three choices as a professional wedding photographer:

  1. Photograph with more than one camera and put different lenses on them so you can simultaneously capture people and events happening from both a wide and close-up perspective as needed.
  2. Photograph with one camera and multiple available lenses and try to *anticipate* which lens you’ll need to capture the key moments. And whenever you’ve got the wrong lens for the moment, shake it off and try to anticipate the best lens for the next key moment.
  3. Photograph with one camera and one lens–either per stage of the wedding or for the whole day–and totally commit to that one perspective and make the most of it.

I should note that, of course, it’s easier to commit to a one camera and one lens strategy–or even a one camera + multiple lenses perspective–if you’re working with a second photographer who is covering a different perspective with a different lens!

Regardless, let’s look at the strengths and weaknesses of each of these strategies.

In the past, I have tended to go with the first strategy: photograph with multiple cameras and lenses simultaneously. This strategy is the “safest”, but certainly comes with some potential problems:

  1. the weight can take a physical toll that may affect the quality of the photography and the photographer’s emotional and physical well-being
  2. decreases photographer’s mobility in a crowded space, which can lead to missed shots
  3. can lead to missed shots while changing between cameras that occasionally get tangled or whose settings get bumped and altered while not in use

The second strategy (photographing with one camera + multiple lenses) helps to ameliorate some of the negative aspects of the first strategy: especially in terms of physical toll, mobility, and missed shots due to tangled or altered settings on the camera not currently being used. However, you’re still carrying around extra equipment (multiple lenses), which is still having some impact on physical energy, mobility, and missed shots while changing between those lenses.

To me, the third strategy (one camera, one lens) is the “holy grail” of a seasoned wedding photographer. I’ve heard some wedding photographers discuss how they photographed a whole wedding with a 24-70 f/2.8 zoom lens. That’s not bad. However, a more impressive move would be to photograph a whole wedding with a single prime lens and do an awesome job of it!

At a more realistic level, one could “cheat” a little on the third strategy to take away some of the riskiness of it. First, instead of committing to one lens for the entire wedding day, you could commit to one lens per stage of the event (e.g,. one for getting ready, one for the ceremony, one for group formals, and one for the reception). I’m often in my car between stages where I could swap out my lens for the next stage. Second, carrying one other lens in a small camera bag on your back can help to hedge your bets and/or give you an appropriate lens for the next stage if you can’t get back to your car,,,without limiting your mobility significantly or adding a significant amount of additional weight.

I’m still working my way from Strategy One (multiple cameras, multiple lenses) to Strategy Three (one camera, one lens), but I’ve still decided to finally replace my home workout equipment anyway…

…because, well, it’s always good to hedge your bets, right?…;-).


Visit Michael's Art Photography Portfolio at SaatchiArt.com!

Do Zoom Lenses Make You Lazy?

13 Thursday Aug 2009

Posted by mgm in All, Wedding

≈ 3 Comments

Share

First, let me say when I photograph a wedding I rely heavily on zoom lenses. I find that too many things are happening too fast to rely on having to reposition myself for shots or on changing my lens to a different prime. Also, I don’t want to have to do a bunch of post-wedding image cropping when the lens I was using was too wide for the shot.

When it comes to my wedding photography, I have made a conscious decision that it is more important to catch as much as is potentially interesting as possible than to:

  1. use a prime lens for the ultimate in optical quality (a difference professional photographers might notice but many clients wouldn’t and/or don’t care about), or
  2. cut my shots down to *only* the premium artistic and emotional shots and become *really* good at properly positioning myself for them knowing I have the limitations of a fixed focal length (prime) lens on my camera.

Now, I should mention that I reduce the impact of issue #1 by using Canon’s very best and most expensive zoom lenses; it’s not like I’m using consumer grade zoom lenses..!

Issue #2 is more interesting to me.

There is an award-winning wedding photographer in the UK (whom I’ve mentioned before: Jeff Ascough) who believes that “less is more” and takes an astoundingly small number of photos during a wedding, even though he’s using a digital camera and could easily shoot more at no additional financial cost–it’s not a financial consideration. I just checked his blog and it appears he shoots with two cameras plus four prime lenses. He seems to be a good example of someone doing #2 above.

I believe that successfully doing #2 would require some transition time…and I’m certainly not going to “experiment” on weddings for which my clients have paid me to produce the same type of work they’ve seen demonstrated on my wedding website using my usual wedding shooting practices!

The thing is, there are significant differences between doing fine art/street photography versus wedding photography:

  • a client *pays* you to photograph a wedding; no one (yet) has paid me to go out and do some street photography…though I’m certainly open to offers..:p
  • there are no “must have” shots when you’re doing fine art/street photography; it’s pretty casual and purely up to your artistic choices
  • fine art/street photography can be as slow-moving or fast-moving as the photographer desires; a wedding photographer–especially a photojournalistic-style wedding photographer like myself–has little control over the pace of events at a wedding
  • in street photography, “missed shots” can be a disappointment for a photographer, but there are always more shots to capture (it’s all part of the fun); for a one-time (well, it’s supposed to be…) dynamic event like a wedding, a missed shot is a “hole” in the wedding coverage that the paying client may be very disappointed about and can’t get back
  • the higher optical quality of a prime lens actually makes a difference in fine art photography because the audience for fine art photography actually notices that sort of thing (they’re usually very “into” photos and looking at them in terms of quality); better quality also can make a difference when making large prints, which would be more typical in fine art photography

Let me address one other issue that someone might bring up about using prime lenses for wedding photography: prime lenses typically come with larger maximum apertures making existing light photography more feasible in dark conditions versus zoom lenses. I often switch to using some primes during a wedding reception once it really gets dark. But this works well for me for two reasons:

  1. I still keep one zoom lens on a camera with a flash because sometimes flash is the best choice and I might as well have a zoom lens that covers a good range starting somewhere wide, like 24mm or 16mm.
  2. Even though there are “must have” shots at a reception, I usually have plenty of time to ready myself for them (the DJ or wedding planner usually lets me know they’re about to happen); otherwise, shooting at receptions is quite casual and relatively easily covered by fixed/prime lenses on my second camera

I’d like to step out of the wedding versus fine art photography discussion for a moment and briefly discuss the use of a fixed/prime lens for my fine art/street photography versus using a zoom lens.

We went on a family vacation during which I decided to shoot some of my leftover film using my Canon film SLR (an Elan 7). I decided to use my Canon 24-105 f/4 L lens with it as a good general purpose zoom lens. I generally enjoyed shooting film as a change of pace from shooting my usual digital; it helped me practice “waiting on” good shots, which I think is becoming a lost art now with the prevalence of digital photography.

Anyway, I got the film processed and scanned to disk. I was pretty pleased with the results; though it was difficult to know whether the photos that didn’t come out very well were more due to the camera or the out-of-date film I used!

Shortly after that vacation, I got a hold of some compact 35mm film cameras with high-quality, fixed focal length lenses (Leica Mini II, Yashica T4, Ricoh GR1s) because my Elan 7 with the 24-105 zoom lens wasn’t very compact; plus I had to worry about it (due to the relatively high cost of the lens) when I set it down to swim in the pool or whatever…and my wife absolutely hates having to keep an eye on my camera equipment!

Well, I was pleasantly surprised by three things:

  1. the quality of the photos was as good if not better than the quality of the photos I got with the expensive Canon “L” lens attached to the relatively large Canon SLR!
  2. the fixed focal length lens forces me to be more strategic and move around more to get a shot….and because of this, I’m getting photos I like better!
  3. I forget this sometimes, but one of the reasons I like photography is being outdoors and running around (I like this much better than spending hours at a computer)! I really like the fresh air and exercise…and bonus: this too usually improves the quality of my photography…:-).

Essentially, I’m using Jeff Ascough’s “less is more” strategy in my fine art/street photography with some real success. I will have more on my experiences with the compact (point & shoot) film cameras in future blog posts.

So, what about the question in my blog post title: Do Zoom Lenses Make You Lazy? Here’s my current answer: zoom lenses are a “crutch”.

  • They help you make fewer decisions of a strategic nature when you are photographing; they cover more so you’re giving up less when using them
  • They smooth over time/place “crunches” caused by dynamic events with simultaneous photo opportunities
  • They compensate for either the inability or unwillingness to move around more physically

I think the unfortunate thing that can happen is that you use zoom lenses even when you really don’t need them. This *can* lead to a certain amount of photographic laziness that really can start to erode the quality of your photography.

If you feel like your photography is getting stale and you’re relying a lot on zoom lenses, try changing things up by using some fixed focal length lenses and forcing yourself to see the world in an interesting way through that one focal length. You may be pleasantly surprised by what you find…:-).

Note: If you’re interested in purchasing one of these high-quality lens, point-and-shoot film cameras I refer to, take a look in B&H’s Used Store; there’s nothing like them that you can buy new anymore…:-(.


Visit Michael's Art Photography Portfolio at SaatchiArt.com!

Photos from a New York Wedding

03 Friday Jul 2009

Posted by mgm in Wedding

≈ Comments Off on Photos from a New York Wedding

Share

When I started this blog, I intended to post more images than I have been. So, for the July 4th weekend, I’ve decided to put up some photos I took at a wedding in Upstate New York. When I do my “high-end” wedding photography package, I do extensive image processing in Adobe Photoshop Lightroom, in which I apply various treatments to create images that stand out more than the sometimes “flat” images that come out of the camera. My wedding clients really seem to like this added processing…enough so that many are willing to pay the additional $1000+ to get it.

After doing the image processing for thousands of wedding photos, I’ve developed a number of presets (much like Photoshop Actions) that make the processing go faster. Also, having a library of presets makes it easier to find the best treatment for a particular image. If you haven’t used Lightroom, you should know there’s a “preview” feature wherein you can hover your mouse over your presets and see a preview of what the image will look like after applying the preset! This is both an incredible time-saver and helps to find the absolute best preset for the image.

Sometime soon, I plan to offer some of these presets for sale at my blog for a relatively nominal fee. So, keep a lookout for those…:-).


Visit Michael's Art Photography Portfolio at SaatchiArt.com!

Canon 5D Mark II Redux – Report from a Wedding (Wedding Photography)

20 Monday Apr 2009

Posted by mgm in Wedding

≈ 1 Comment

Share

I shot my first wedding using a Canon 5D Mark II. I’ve got it on loan and have nothing invested in having to like it (if I’d bought it, I’d have to rationalize the purchase!). I’m a long-time 5D user and I have also owned and/or used various 1-series Canon DSLRs. I photographed approximately 40 weddings over the past three years.

Canon 5D Mark II, Canon 15mm Fisheye lens, 100 ISO,
f/2.8, 1/200 sec, aperture priority
 

I was interested to see how well the new auto ISO feature worked because it covers almost the entire range I’ve ever used with the 5D (all except for an ISO of 50). I also wanted to see how well the new auto 1/60 – 1/200 flash sync setting worked for flash photography. But before I report on those, I have a note of warning for Canon 5D users…

New Placement of AF-On Button
If you’re a heavy user of the AE-lock button like me (it’s the “*” button at the top right rear of the 5D that you use to lock in an exposure settting), beware the new AF-on button on the 5D Mark II that is now located just to the left of the AE-lock button…(!) I couldn’t figure out why the AE-lock button wasn’t working very well for much of the day, until I realized my thumb was used to reaching for “the far left” button whenever attempting to press the AE-lock button. But on the Mark II, Instead of pressing the AE-lock button, I was pressing the AF-on button, which seemed to be doing absolutely nothing!

So, if you’re a heavy user of the AE-lock (*) button on the 5D, be sure to retrain your thumb before shooting an event with the 5D Mark II. Note: I just discovered you can actually swap the functioning of the AF-on and AE-lock buttons in the custom function settings; so you may want to look into that.

Canon 5D Mark II, Canon 24-70mm f/2.8L lens, 1600 ISO,
f/2.8, 1/10 sec, aperture priority; processed in Lightroom

RAW Image File Sizes
I shoot weddings in Camera Raw (i.e., with the camera set for camera raw image file format) to make image adjustments easier afterward. There was no way I was going to shoot 21 megapixel raw images with the Mark II; image files that large would fill up my 8 GB memory cards too fast! So, I chose the Mark II’s new sRAW1 format, which yields 10 megapixel images. According to Canon’s EOS 5D Mark II instruction manual, these 10 megapixel images are about 14.8 MB in size. This brings me to two issues…

1) The 5D Mark II is giving you 10 megapixel raw images that each take up 14.8 MB of space on your memory card. Well, it turns out that a full 12.8 megapixel RAW image on the 5D takes up less space on your memory card…about 13 MB! Now, I’m guessing this is because the images have gone from 12-bit to 14-bit. What will make a bigger impact on your client…the color depth in the images or the number of pixels? I guess you’ll have to be the judge. In any case, the 12.8 mp RAW 5D images take up less space on a memory card than the 10.0 mp RAW 5D Mark II images.

2) I took a look at the image file sizes for the images I shot at this last wedding. (I was shooting with both a 5D and the 5D Mark II.) The file sizes from the 5D ranged from about 12 MB to 16 MB. The file sizes from the 5D Mark II (sRAW1) ranged from about 10 MB to about 23 MB. So the file size is much more variable on the Mark II and really depends on what you’re shooting.

Auto ISO
I was really looking forward to the new 100-3200 Auto ISO feature when I first heard it was going to be included on the 5D Mark II months ago. How many times have you suddenly gone from a low-light situation to a bright-light situation while photographing (e.g., a bridal couple coming out from inside a dark church to the bright sunshine outdoors) and forgot or didn’t have a chance to change the ISO from 1600 or 3200 ISO to 200 or 100 ISO??

In a nutshell, this new feature isn’t the “silver bullet” I hoped it would be. I didn’t have any problems with it outdoors, though I have heard some say it selected a higher ISO than they would have wanted in such situations. My main issue with the auto ISO is when it selects a too-low ISO (especially indoors) and allows the shutter speed to go down to 1/20 second! I’ve got a number of blurry indoor shots for which I wish the camera would have selected a higher ISO and shutter speed when I was shooting with the lens wide open in aperture priority mode. Maybe auto ISO works better indoors in shutter priority mode?

If you could set a minimum shutter speed in the custom functions, that would be a possible solution; that doesn’t seem to be available with the 5D Mark II. Also, be aware that the upper end of the auto ISO changes to 400 instead of 3200 when you have a flash attached and turned on.

One other thing: I was wondering what would happen if you had the camera in manual exposure mode and had the ISO set at auto; would the ISO fluctuate so that your exposure would suddenly be off? Or maybe the ISO would change to accommodate changing lighting conditions, effectively giving you a semi-auto-exposure manual exposure mode! Well, it turns out the ISO simply fixes at 400 ISO regardless of the lighting conditions.

New 1/60 – 1/200 sec Auto Flash Sync
In addition to the 1/200 fixed flash sync speed on the 5D which works in aperture priority mode (I use this a lot because it works much better than Auto when you’re shooting in a dark room with a flash in aperture priority mode), the new Mark II also has a variable 1/60 – 1/200 sec auto flash sync for flash photography that works in aperture priority mode. Well, I have to say I didn’t notice much of a difference. In fact, when you’re trying to catch people moving and dancing around in dark reception halls, you almost always need 1/200 anyway. I still like the idea of it, but it didn’t make as much of an impact as I had hoped.

920,000 Deceiving LCD Pixels
The new 3″, 920,000 pixel LCD is quite nice; it’s certainly much less “pixelly” than the 3″ 230,000 pixel LCD I witnessed on the 40D! However, the definition is *so* nice, I think it can actually deceive you into thinking the captured image is actually sharper and better focused than it really was! It misled me more than once. Probably once you get used to the higher definition LCD, you’re better able to discriminate between the sharp/in-focus images and the blurry/out-of-focus ones.

Odds and Ends
The auto white balance (AWB) on the 5D was never that good, but my initial experience with the Mark II indicates it’s no better. In fact, it seemed ever so slightly worse to me. The autofocusing system on the 5D Mark II is the same as it was on the 5D; this indeed seems to be the case (i.e., it works fine in most cases, but tends not to be very good in low light…especially without a flash attached and the AF Assist turned on).

For some reason, it really stood out to me how well the Mark II performed when I was taking photos of the people in the receiving line just outside the church. It was a bright mostly cloudy afternoon and almost every photo seemed to a have close-to-ideal exposure with the camera set to aperture priority + auto ISO. However, in other cases, with strong backlighting, I was having a heck of time getting the proper exposure…even when I switched to spot metering.

I liked being able to switch the ISO to 6400 on the Mark II to get some important shots in the dark church where the ceremony took place. However, I’d swear there were shots I could get with the 5D at 3200 ISO that required me to switch to 6400 on the Mark II to get. And even though I was using two different lenses on the two camera bodies (70-200 f/2.8 on the 5D and 24-70 f/2.8 on the 5D Mark II), I had them at or near the same maximum f/2.8 aperture on both lenses when I really needed to, and the 5D seemed to need less light for a proper exposure. Not a completely controlled experiment, but…

Conclusion
So, the 5D Mark II was really my “main” camera for this wedding and it did a pretty decent job. However, I really don’t feel like it was a significant “step up” from using my good old 5D as my main wedding camera. I said this in a previous blog post and I’ll say it again here: I sincerely think a lightly used 5D for around $1300 at eBay may be a better purchase right now than a 5D Mark II for around $2700….*unless* you really want or need the capability of: the extra 8 megapixels per image, high definition video recording, or shooting at 12800 – 25600 ISO even though the camera may not be able to autofocus in such low light conditions.

All images and text are (c) Michael Grace-Martin Photography. 


Visit Michael's Art Photography Portfolio at SaatchiArt.com!

Canon 1DS Mark II, Canon 1D Mark II & Mark III, Canon 5D Mark II, Canon 5D, and Wedding Photography

14 Tuesday Apr 2009

Posted by mgm in Wedding

≈ 2 Comments

Share

On the brink of the majority of my 2009 wedding photography season (I had one wedding in January), I have been looking around for another camera to accompany my trusty old Canon 5D. I’ve used this 5D for over two years as my main camera for weddings and portrait sessions; it’s got some mileage on it and I’m worried I might get to the end of its shutter lifespan any day now. (Having to get a new shutter isn’t the end of the world; but it *is* expensive and puts the camera out of commission for a week or so.) So I really think it’s time for a new “main” camera to shoot weddings with. Perhaps the trusty old 5D can take over the role of “second” camera…(?)

I’ve always shot weddings–and will continue to do so–with two cameras for at least two reasons:

  1. It makes two different lenses (e.g., wide angle and telephoto) immediately available at all times
  2. I have a backup immediately available if something goes wrong with one of the cameras or lenses

Last year I used a Canon 1D Mark II as my second camera. It was an ideal camera to put a 70-200mm lens on and take photos outdoors or indoors. The camera is relatively big and heavy, but this helps to steady your shots when you’re using a big and heavy telephoto zoom lens (like a 70-200 f/2.8) that tends to tip everything forward. It also worked well with my 15mm fisheye lens because the 1.3 crop factor of the 1D series cropped some of the most distorted part of the image (for which fisheye lenses are famous), but left lots of nice wide angle coverage.

I considered moving the 1D over to being my main camera with the flash for weddings (my “main” wedding camera always has a flash attached for when I need some flash lighting), but I found that it never performed as well with my 580EX II or my 550EX flashes compared to my 5D. Also, I’ve gotten used to having the 12.8 megapixels of the 5D–especially for large group shots, because I like to leave extra space around the groups in the image so my clients can crop them to different sizes and aspect ratios–and feel that 8 megapixels is on the edge of acceptability. One other factor playing into this decision was my new involvement in stock photography where they really prefer as many megapixels as you can give them. I decided to sell the 1D Mark II.

What about the new 21 megapixel 5D Mark II? Isn’t that what 90% of wedding shooters using Canon equipment are doing?! Well, the main thing I like about the 5D Mark II is the ability to shoot at even higher ISOs than the 5D or 1D Mark II (6400 ISO and even 12800 ISO look usable on the 5D Mark II). But the camera I’m looking for here is my main camera with the flash attached; I usually shoot the low-light, non-flash photos at weddings using my second camera with the “specialty” lenses attached (e.g., my f/1.2 and f/2 primes). The 5D Mark II is an expensive “second” camera! Especially because I would want the vertical grip on it to make work better with the 70-200 f/2.8 telephoto zoom. With the grip, the 5D Mark II is pushing the $3000 barrier. I also have an issue with the autofocusing system on the 5D Mark II being the same as the 5D; both of which aren’t that good in low light compared to the 1-series. Plus 21 megapixels is overkill for my needs; and the HD video capabilities aren’t something I care to get involved with at this point.

What about the 1D Mark III? It’s got the great low-light focusing capabilities of the 1-series cameras! I borrowed and used the 1D Mark III for four weddings last year. I like the focusing system and used the max ISO of 6400 quite regularly. But in addition to many of the reasons I’ve ruled out the 5D Mark II (including it working better as a second camera than my main camera), the 1D Mark III is more expensive (about $4000) and has only 10 megapixels…which is fine for wedding photography, but which makes it less attractive for stock photography than even the 5D. (Note: high ISO capabilities are of little value for stock photography because they [the stock photo companies] seldom accept images with an ISO of higher than 800 from *any* camera.)

Well, let me tell you, I convinced myself that the Canon 1DS Mark II was the camera I was looking for! It’s got 16.7 megapixels (plenty of resolution for stock and weddings), the 1-series focusing system that works well in low light, and it’s a workhorse tested to 200,000 shutter actuations! Sure, it doesn’t have a self-cleaning sensor and the LCD is only 2″. But I’ve only had one camera with a self-cleaning sensor and many of my LCDs have been 2″ or smaller (e.g., the 1.8″ LCD on the 20D), and none of this scared me off.

So, I found a $2100 1DS Mark II in really nice shape and bought it. It had fewer than 50,000 shutter actuations and should last, I felt, at least a couple of wedding seasons. I did some preliminary testing and found it to worked well. I compared images to my 5D and saw that the noise at 1600 and 3200 ISO was even slightly lower on the 1DS. I was pretty happy!

Before the end of my 7-day testing period, I put a 580EX II flash on the 1DS and took it to a fashion show. I generally stay away from flash photography as much as possible. But there are times at weddings–especially during night-time wedding receptions–when I simply can’t avoid using my flash or flashes to provide some needed light.

The fashion show was taking place in a somewhat dark gymnasium in the late afternoon on a dark, dreary, and cold early Spring day. I was taking some photos at 3200 ISO with my 70-200 f/2.8L IS lens on my 5D and the shutter speed was still quite low: 1/40 and 1/30 sec. I tried a few flash photos with the 1DS; but since the ceiling was so high and there were no walls around, I didn’t like the absence of reflected light (I usually “bounce” the light from my flash as much as possible) and didn’t take many flash photos.

Well, I had promised to take photos of a certain group of models because I knew one of the models in the group. It was getting time for me to leave, so I gathered the group for photos. It was evening at this point and quite dark; so I was going to have to use the flash. Well, I discovered that the 1DS was having quite a lot of trouble focusing to take the flash photos! This was true when the models were standing still and even worse when I tried to take of photo of them walking toward me.

I believe part of the problem stemmed from sporatic functioning of the AF Assist light; when the AF Assist wasn’t coming on, it was having lots of trouble focusing and allowing me to take the photo. It was pretty embarrassing when I couldn’t get it to work in a timely fashion standing in front of these models!

The next day, I decided I needed to get to the heart of the problem. I have the Canon 580EX II Speedlight and the older 550EX Speedlight. So I did a bunch of side-by-side tests. I put the 580EX II on the 5D and tried some shots without the lights on in my basement; then I put it on the 1DS and tried the same shots. I did the same thing with the 550EX on the two cameras.

The AF Assist was working on both cameras with both flashes; so I’m not sure why I had *that* problem the night before; maybe it was one of those weird temporary problems that goes away if you turn the camera or flash off and back on.

In any case, here’s what I found: compared to using a flash on my 5D, there was a slight but significant delay in the flash firing and the shutter opening on the 1DS MkII, even when the AF Assist light was working. The delay was long enough that if you were photographing someone walking in a low light situation (e.g., a wedding couple coming toward you down the aisle in a dark church), the focus would never lock in, the flash would never fire, and the shutter would never trigger. *This* was exactly the problem I was having at the fashion show!

I tried all sorts of different settings to get rid of this delay on the 1DS MkII. The only solution that came close was putting the camera focusing system in AI Servo mode, regardless of whether the subject was moving. This got rid of the delay, but most of the flash pictures taken were out-of-focus; i.e., it no longer stopped me from triggering the shutter and flash until it was in focus, but then most of the time it was out-of-focus!

Now I don’t know if this is an issue with this particular copy of the 1DS or if I’m missing some other setting I could tweak (I swear I tried them all); but I decided this flash delay killed any chance this camera had for being my “main” wedding camera. I sent it back.

So, where does that leave me?

It occurred to me that I have no problem with the 5D being my “main” wedding camera with the flash attached. The only problem I have is using my current 5D because it’s been through so many weddings! But if I could find another one that hasn’t been used so much, it should make a fine main wedding camera.

Even though I have some reservations about buying used camera equipment from a place like eBay which, obviously, features camera equipment used by non-professionals; it’s the perfect kind of place to find camera equipment that hasn’t gotten much use. Even though professionals may be better about taking care of their equipment (this isn’t always so), they actually *use* the equipment because that’s what they use for their work! Amateur photographers, on the other hand, may go through phases of taking photos and ultimately give the equipment light overall use. Also, amateurs may treat their equipment better because it’s part of an enjoyable hobby.

In any case, I decided to buy a relatively lightly used 5D on eBay to be my “main” camera with flash attached for weddings. I also bought two other things to set up my trusty old 5D as a good second camera: 1) I bought a vertical grip to make it easier to handle with the big 70-200 f/2.8L IS attached, and 2) I bought a Canon ST-E2 Speedlight Transmitter to give it an AF Assist light in particularly low-light situations (and also to do some creative lighting during wedding receptions in conjunction with my two flashes…more on this in a later post).

So, we will see where these decisions take me. I’ll have more to say later in the wedding season!

-mgm


Visit Michael's Art Photography Portfolio at SaatchiArt.com!

MGM’s Twitter Feed

Twitter
Michael Grace-Martin
@mgmsbrain

@cbouzy I'm moving my Twitter account over to Spoutible. Already started an account at spoutible.com/mgracemar 😀

reply retweet favorite
8:32 pm · April 7, 2023
Twitter
Michael Grace-Martin
@mgmsbrain

I think I'm just going to move over to Spoutible because I like how they're doing things over there. Check it out and maybe follow me there at spoutible.com/mgracemar

reply retweet favorite
10:26 pm · April 6, 2023
Twitter
Michael Grace-Martin
@mgmsbrain

Saratoga Racetrack (Aug 2019) #streetphoto #streetphotography #colorphotography #eventphotography #candidphotography #saratogany #saratogaracetrack #photography pic.twitter.com/rNRYx2T23F

reply retweet favorite
6:20 pm · January 25, 2023
Twitter
Michael Grace-Martin
@mgmsbrain

Seat at the Table (2011) #portraitphotography #portrait #portraiture #female #woman #throwbackthursday #throwback #bnwportrait #bnw #bnwphoto #photography pic.twitter.com/CIMurIxGGb

reply retweet favorite
9:56 pm · January 17, 2023
Twitter
Michael Grace-Martin
@mgmsbrain

Grassroots Festival (July 2022) #street #streetphotography #photography #eventphotography #candidphotography #people #grassrootsfestival #trumansburg #streetshot #fashionstyle pic.twitter.com/xd2rsmO3bu

reply retweet favorite
9:55 pm · January 17, 2023
Follow @MGMSBRAIN

Subscribe to this blog!

 Subscribe via your own reader

Hosted by:

Recent Posts

  • My Latest Photos and Tweets
  • Fall Fashion (Oct 2019) by Michael Grace-Martin
  • Smithsonian Center for American Art, Washington DC (July 2016)
  • The Great New York State Fair, Syracuse, NY (Sept 2016)
  • 2016 Ithaca Festival Parade
Easy way to support this site: Buy Toilet Paper!

Proudly powered by WordPress Theme: Chateau by Ignacio Ricci.