• Home
  • MGM’s Photos
    • Fashion/Glamour
    • Nudes
    • Street
  • Shoutouts
  • Reviews
  • Interviews
  • Commentary
  • About
  • Contact

Michael Grace-Martin

~ Photography, Art & Life

Michael Grace-Martin

Category Archives: MGM’s Photos

Point-and-Shoot Wedding: Photographing a Wedding with a Compact Digital Camera

29 Thursday Sep 2011

Posted by mgm in All, Commentary, MGM's Photos, Wedding

≈ 4 Comments

Tags

candid, event, photographer, photography, wedding

Share

I am a professional event photographer and I own thousands of dollars worth of professional digital camera equipment. I have photographed many events with my “high-end” photography equipment. When I’m not photographing events as a hired professional, I often use much smaller and less expensive cameras (both digital and film) to capture photos. I have been impressed with the quality of the images I been able to get with my smaller, less expensive cameras. The images don’t have quite the resolution or color depth of the files I get from my high-end, professional equipment, but in many cases I’ve found they’re pretty darn good…and often good enough for their usual uses–e.g., to display on web pages, make smallish prints (up to 8×10), or to make photo books.

As long as the subject matter isn’t fast-moving (e.g., sports) or ensconced within a large, dark interior space (e.g., big, dark reception halls at night), using a non-DSLR camera with a small sensor can perform reasonably well.

So, it’s always been a fantasy of mine to photograph a wedding with a compact, “point-and-shoot” digital camera and see what I could get.

You might ask, “Why would a professional photographer want to show that a wedding could be acceptably photographed with an inexpensive camera when part of what his/her clients are paying for is that expensive, high-end equipment that mere ‘mortals’ can’t afford?”. The high-end equipment provides something extra for your money, no doubt. I most certainly get shots with that pro equipment that I can’t get with a compact camera; I am not disputing this.

However, I think that a truly experienced and professionally skilled wedding photographer *should* be able to get good shots even with decent but much less expensive non-professional digital camera equipment–i.e., it should be more about the photographer’s eye and skills than about the equipment they’re using.

I suppose the purpose of this article is two-fold: 1) as a response to the hegemony of the camera companies–and the people who eat up their message–that you need (and need to keep buying) the latest and greatest camera equipment to produce good photos at events like weddings, and 2) to reiterate the message: “It’s the photographer that makes the great images, not the equipment”.

A good photographer who really knows his/her equipment knows how to get the camera to make great images. A photographer can have a great/expensive camera + lenses + accessories and still make lousy images. Successful photography is all about the photographer and how well s/he knows how to use her/his camera equipment. The message here is not original with me; but I find it helpful to prove things for myself.

So, on with my “story”…

I had been looking for a wedding I could photograph in which: a) the wedding couple wasn’t going to have a wedding photographer, so they’d be grateful for any wedding photos I could give them (assuming I didn’t charge them or charged them very little), or b) be a free “extra” photographer in combination with the paid lead photographer. In either case, if my point-and-shoot photos didn’t come out well, no huge loss would be incurred.

Well, I found a wedding with a paid lead photographer. There was also a second person (who owned the venue) taking photos with professional quality DSLR equipment. Then there was me with my compact camera with a built-in zoom lens…much like any wedding guest might have. In fact–with the permission of the wedding couple–I posed as just another wedding guest with a camera. So, really, this “experiment” had two facets: 1) taking photos with a compact digital camera like any guest might have, and 2) taking photos while not being in the obvious role of a paid professional photographer.

As it turned out, a number of factors were operating against me:

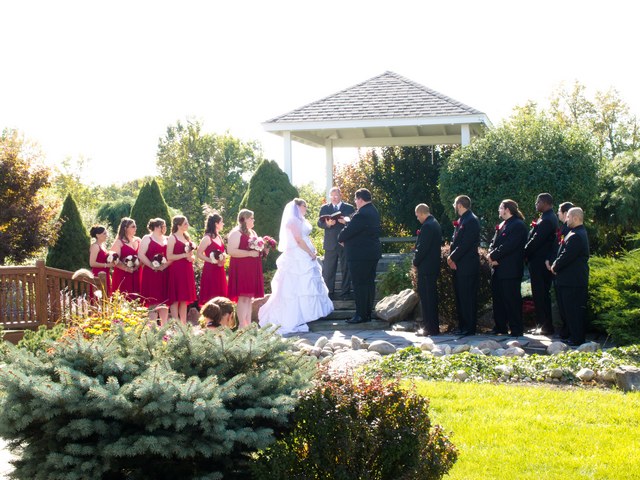
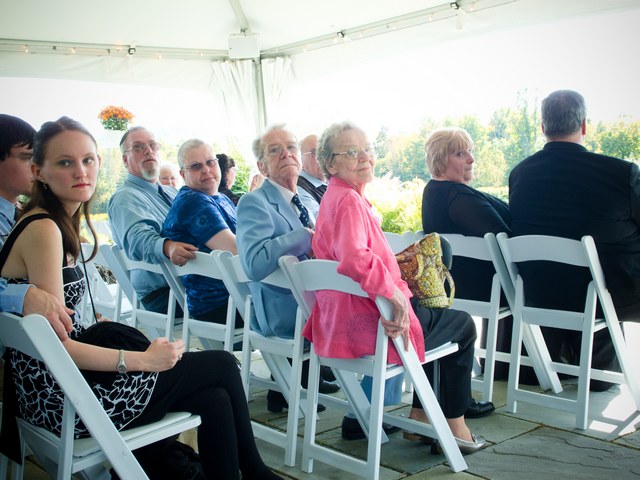
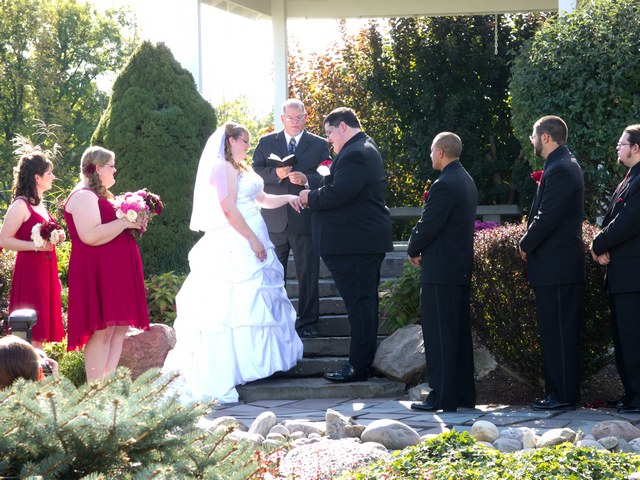
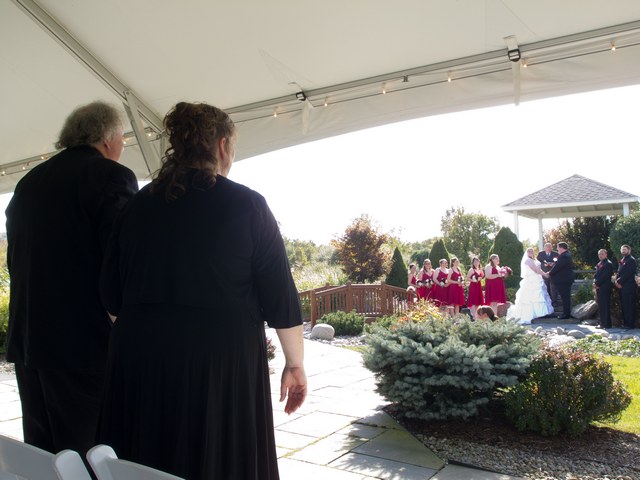
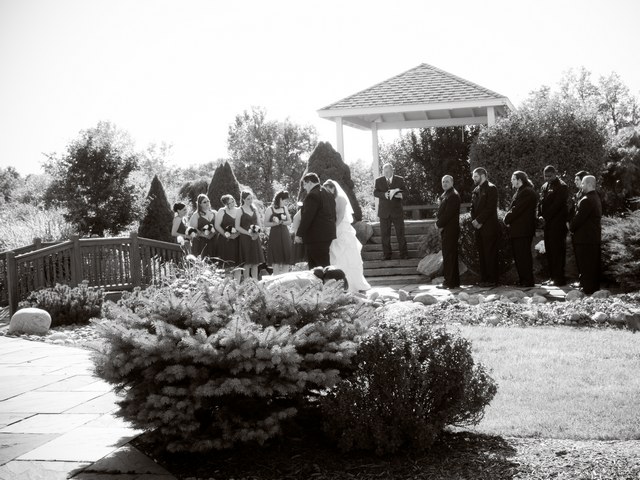
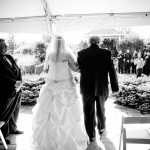
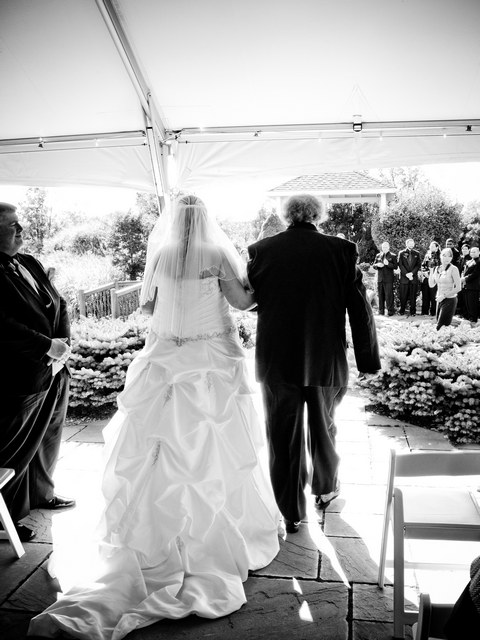
1) Even though wedding guests–especially ones with expensive DSLRs–will sometimes get out of their seats at ceremonies to take photos, I vowed to stay in my seat with the point-and-shoot guests because that’s more typical behavior for a guest with a camera and I was trying to be convincing in my “wedding guest” role. Also, with two other photographers roving around taking photos during the ceremony, I’m sure they didn’t need me getting in the way (this, of course, is my ideal notion of the thought process of wedding guests at weddings that *I’m* paid to photograph!…but I digress..). So, I took all my ceremony photos from an aisle seat.

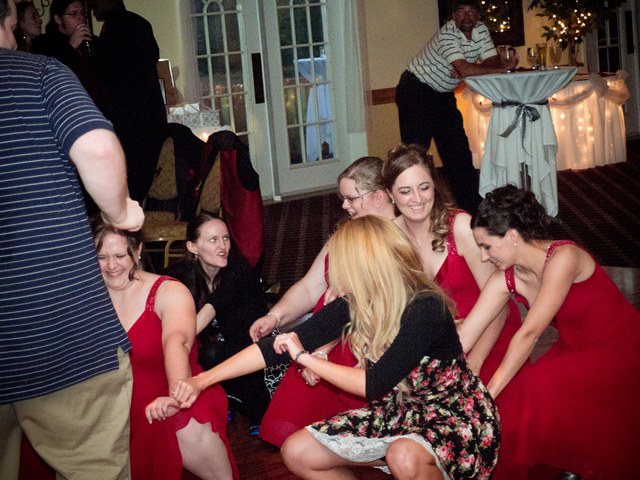
2) Taking photos of people other than: the bride and groom, their parents, or the wedding party (who are always “fair game”) was somewhat awkward because, “Who the hell is this other guest–who I don’t know–taking a photo of me when I’m not in the wedding?!”. I tried to sneak in photos of other guests, but it was a little tricky.

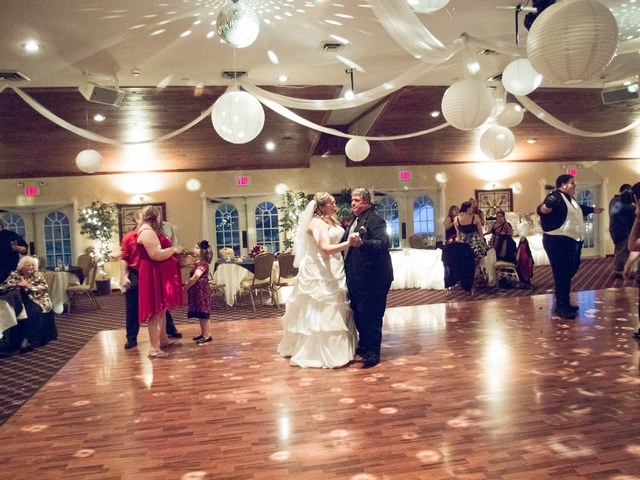
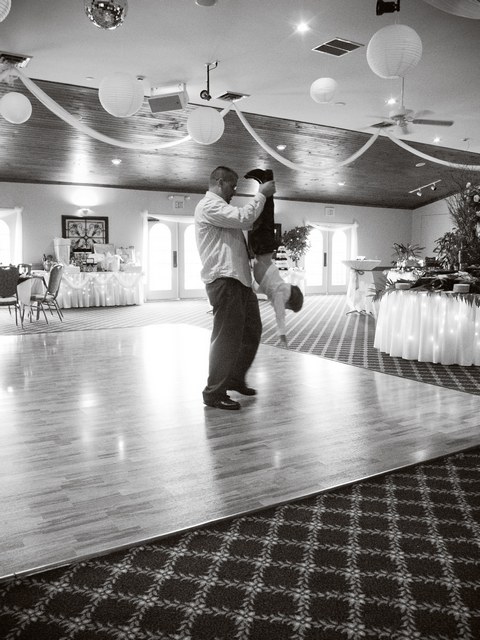
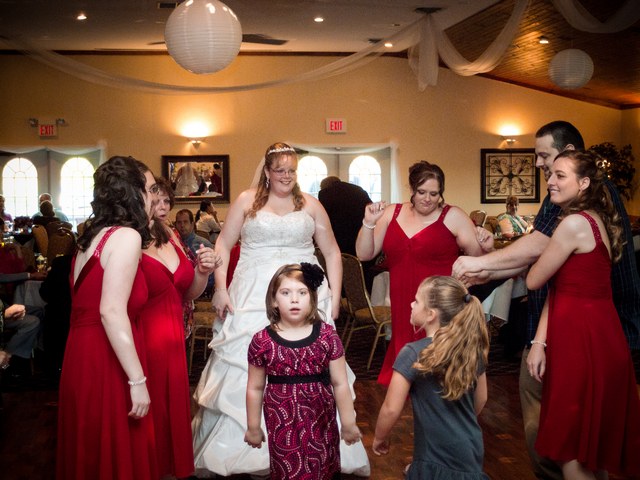
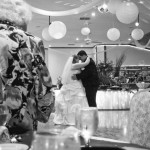
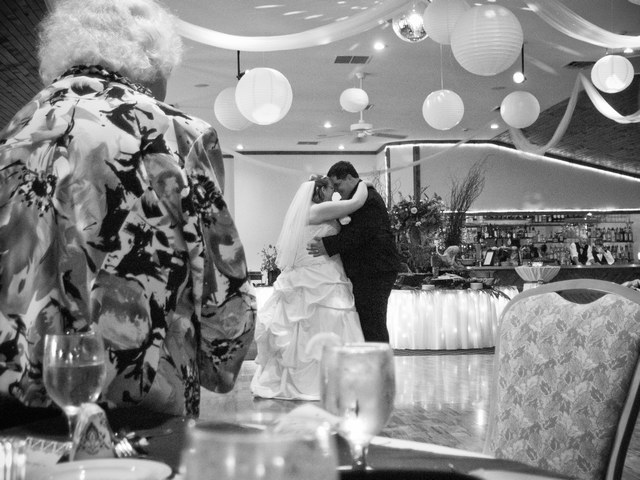
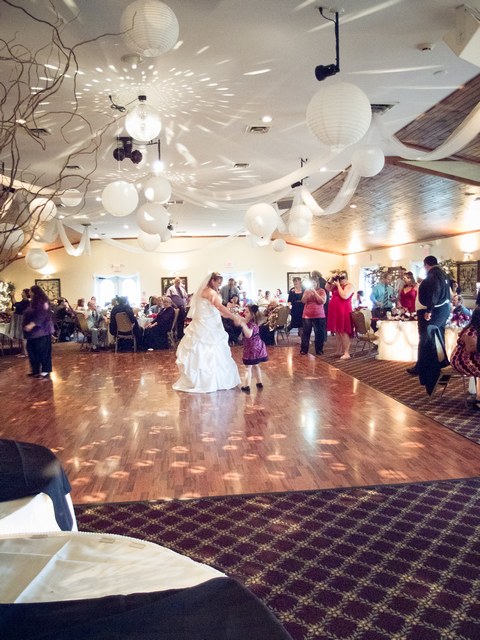
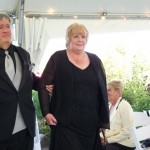
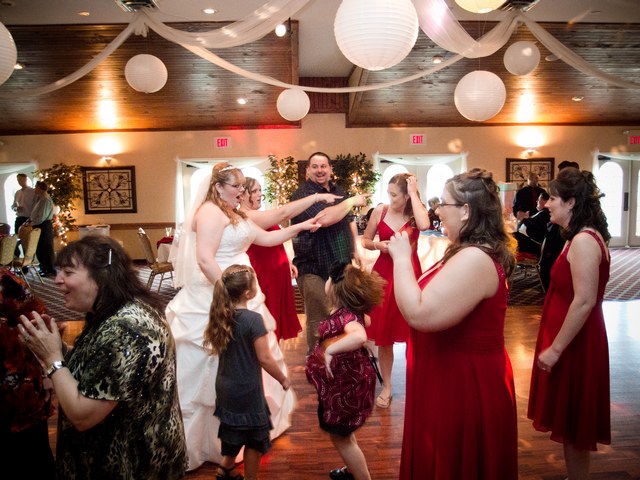
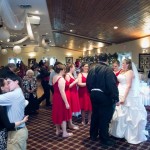
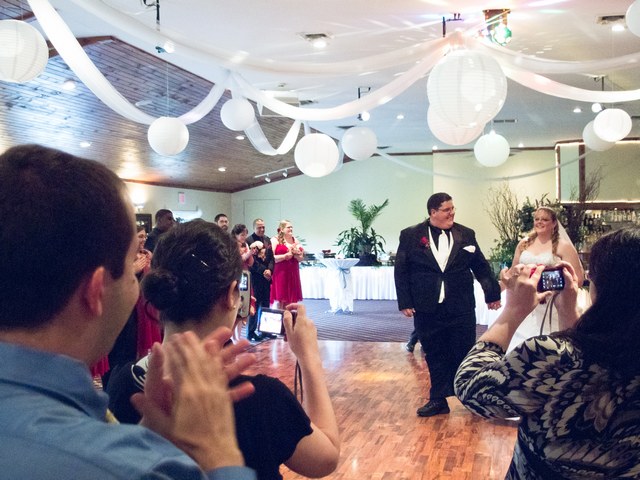
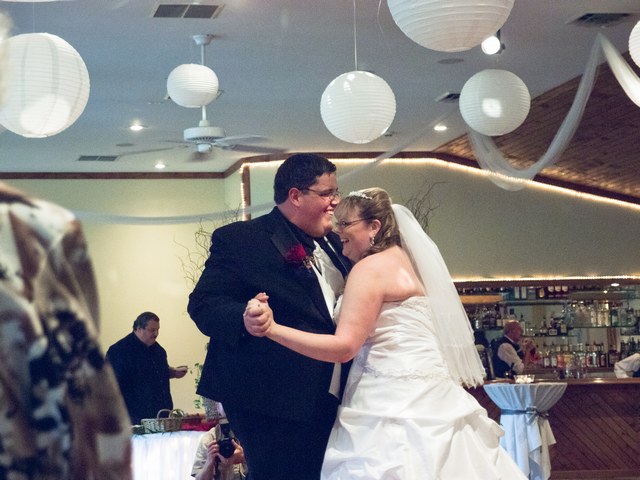
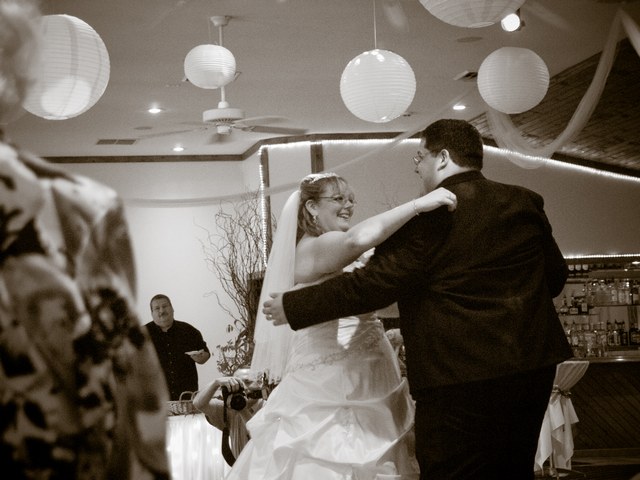
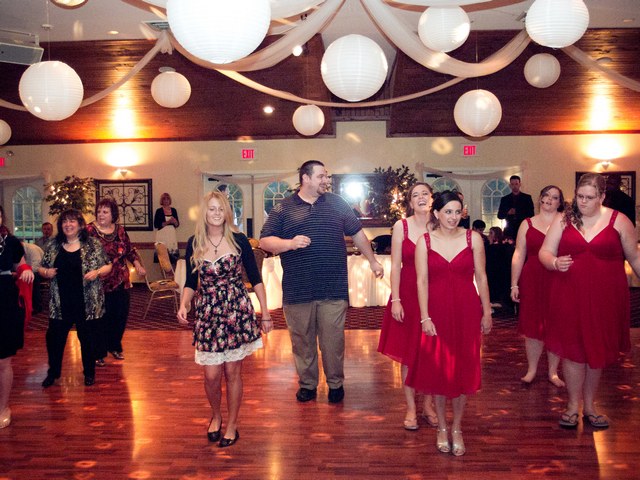
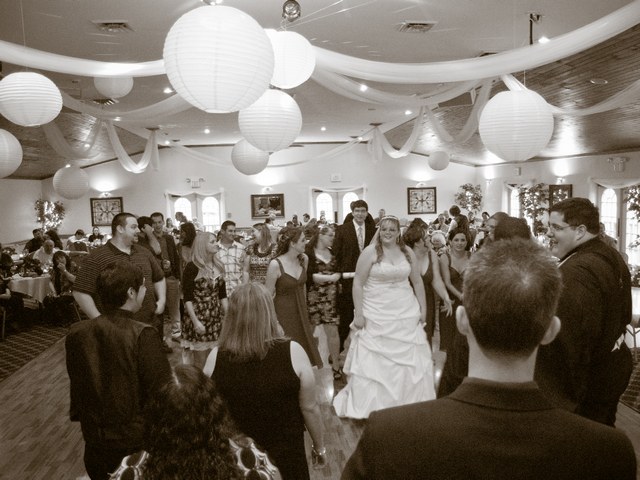
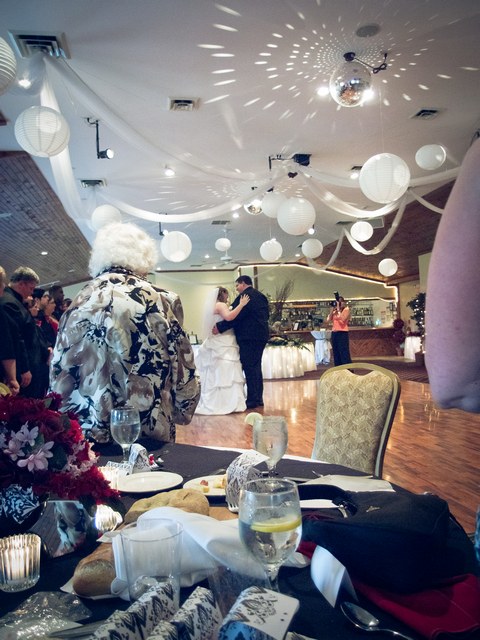
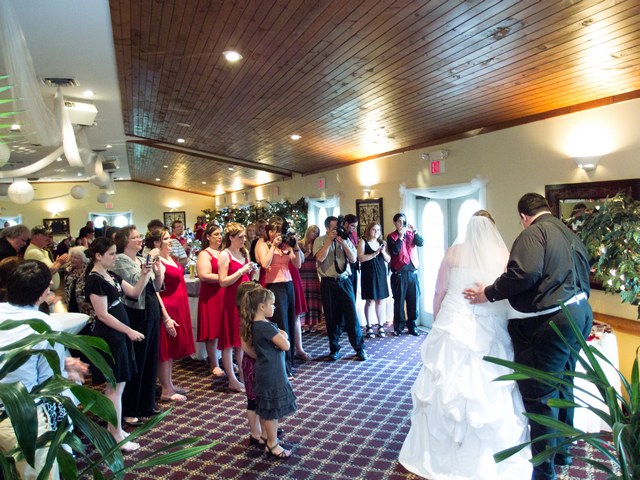
3) During the introductions and first dance, I stayed at my table with the other guests. Again, I was trying not to stand out too much as “Mr Photographer Guy”. So, instead of getting typical first dance photos, you get the perspective of a guest seated a couple tables away from the dance floor. I actually found this “guest” perspective of the dance interesting and fun.

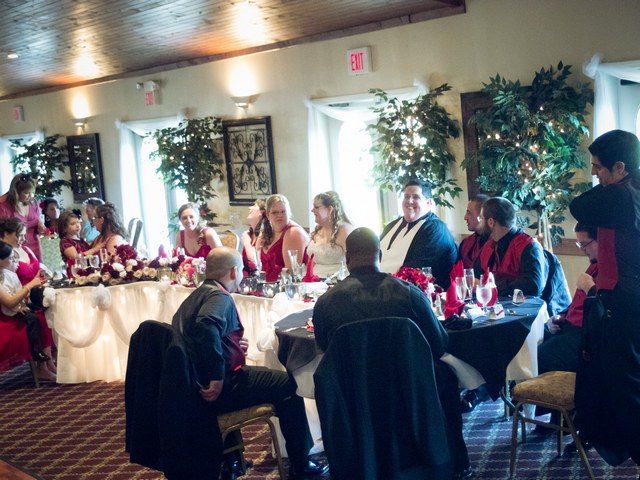
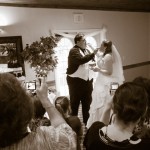
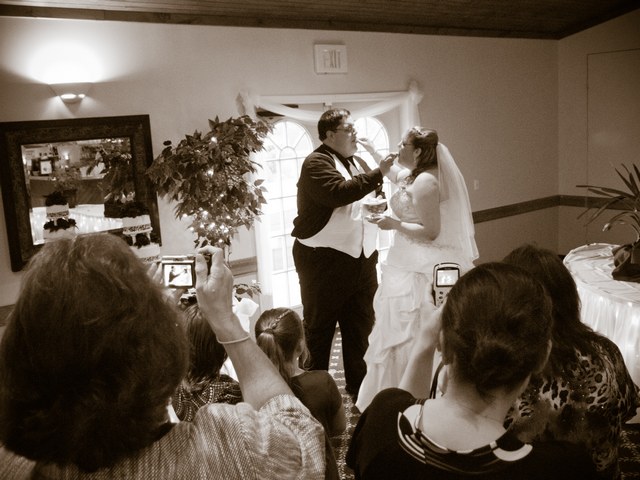
4) In trying to stay out of the way of the first and second photographers, I had to “hang back” a lot and also get alternate perspectives on things. So, during the toasts, I took in a wider perspective…sometimes with the other photographers in the shot. During the cake cutting, I was initially behind the wedding couple–because the other two photographers were in the front–taking shots of the crowd surrounding them (a perspective I don’t normally get as a lead photographer, though it’s a nice perspective to have!).

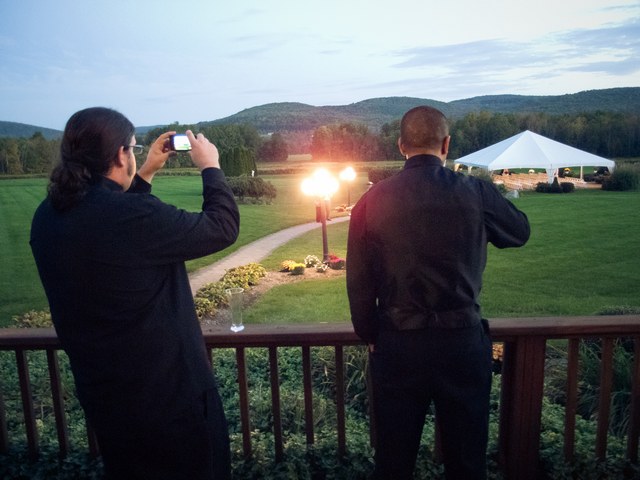
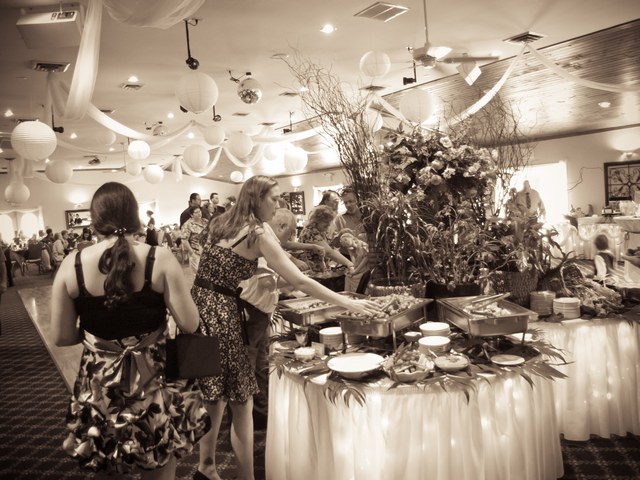
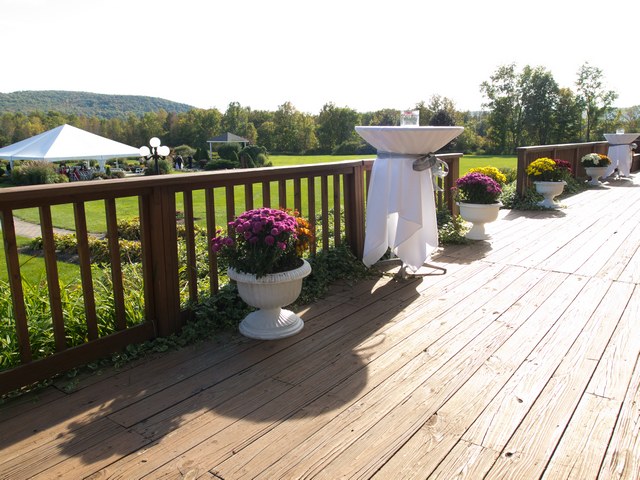
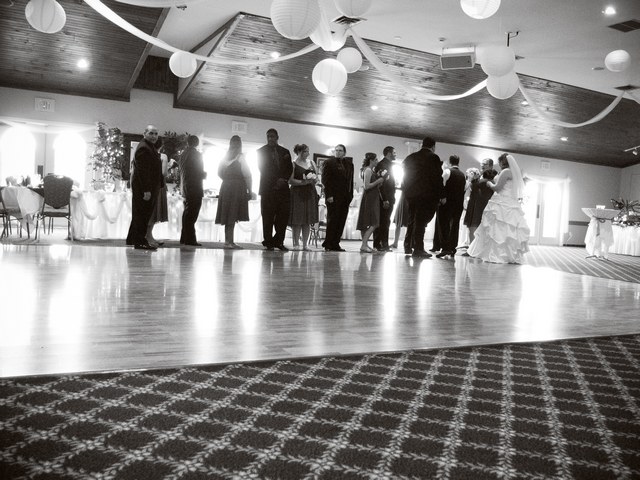
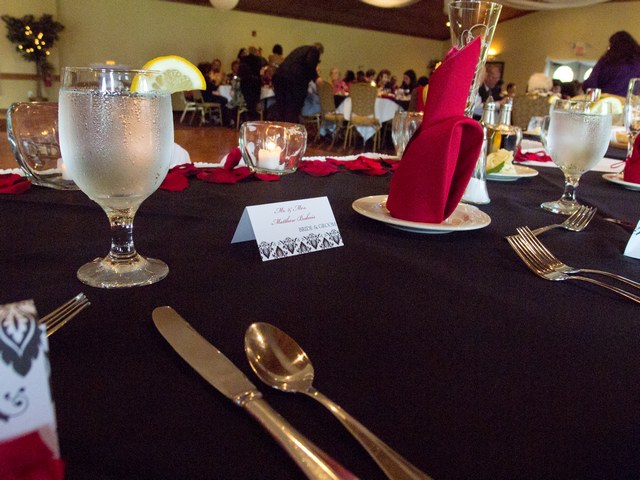
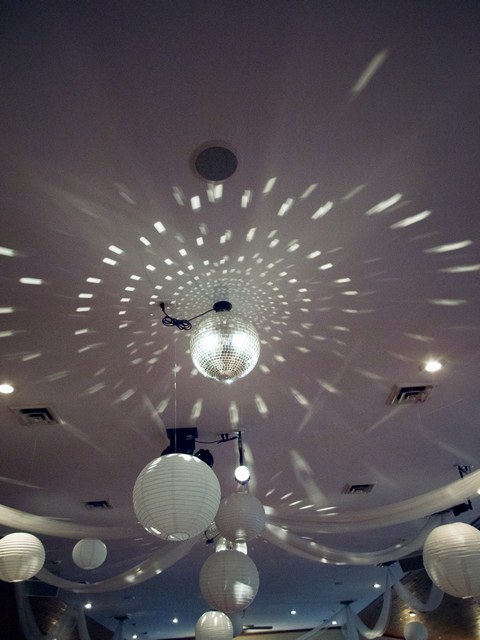
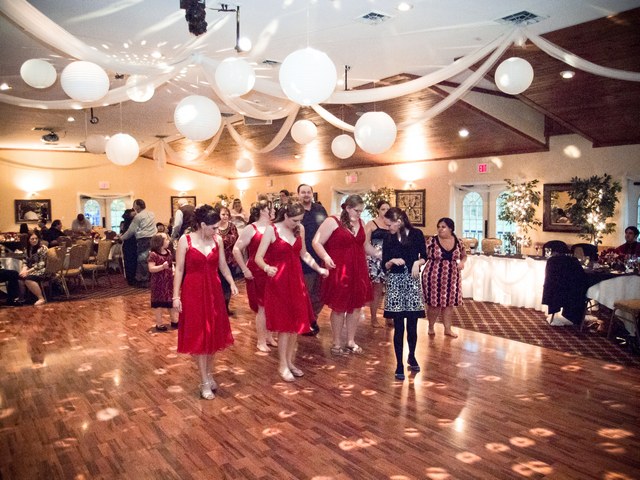
5) And finally, the small sensor on my camera was fine when we were outdoors, and even indoors before it started getting dark. But once it got darker, I was struggling with existing light shots (which I tend to prefer). At some point in the evening, I started using a hot shoe flash on my compact camera, aiming the flash toward the ceiling. When I was close enough to the subject, it worked reasonably well. It’s a pretty small flash, though, and I struggled to get anything farther than 10-15 feet away (something I can do with my big, expensive DSLR equipment). I still took *some* existing light shots so I could capture some of the ambient lighting; if you don’t mind a little digital noise, they’re not bad.

So, what do I conclude from this little “experiment”?

I was able to get many–though not all–of the images I wanted to get. I was talking to the lead photographer at the wedding (briefly, so as not to compromise my wedding guest “confederate” status) and mentioned that I felt I was getting something like 80% or so of the images I could get with my much more expensive professional camera equipment. Is that missing 15-20% crucial? Maybe, maybe not.

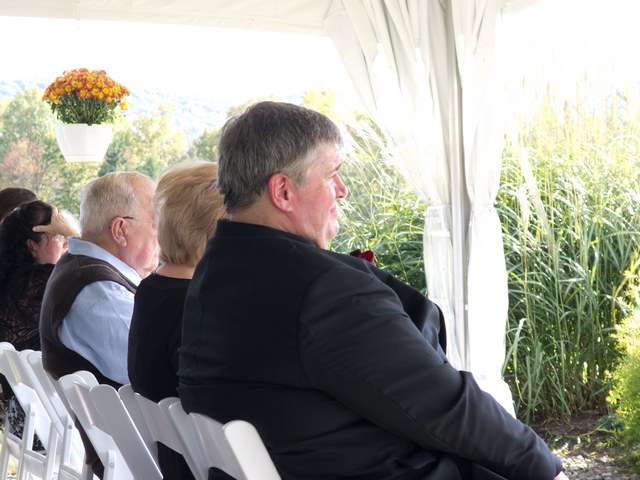
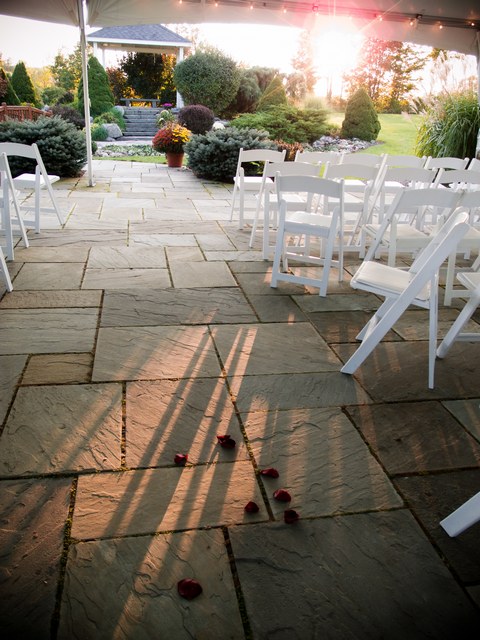
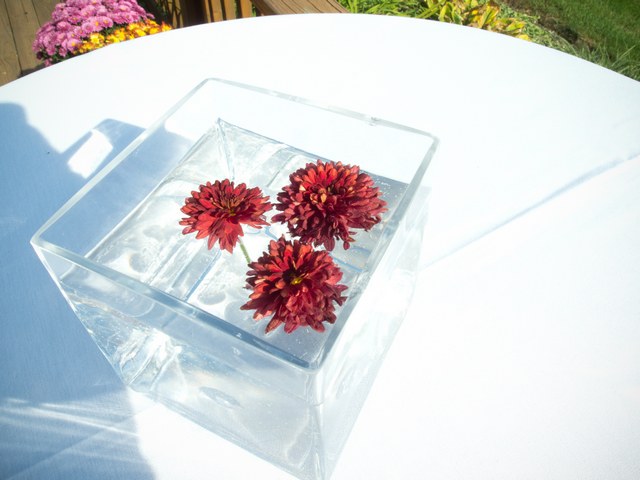
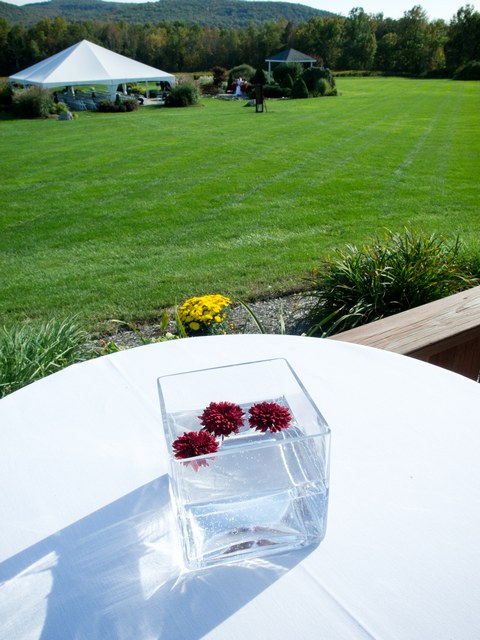
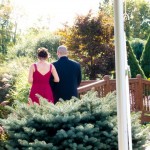
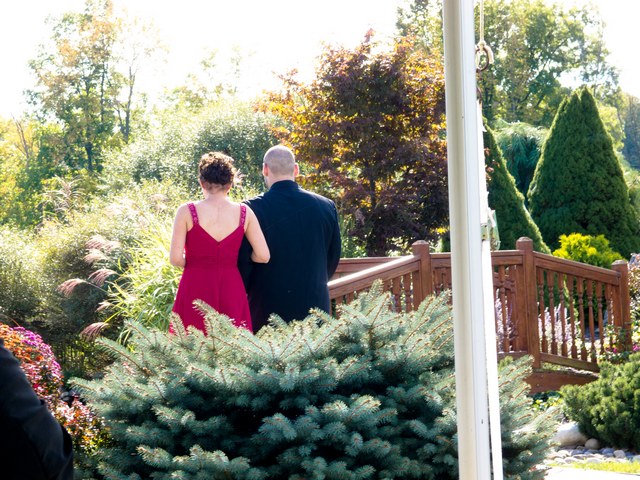
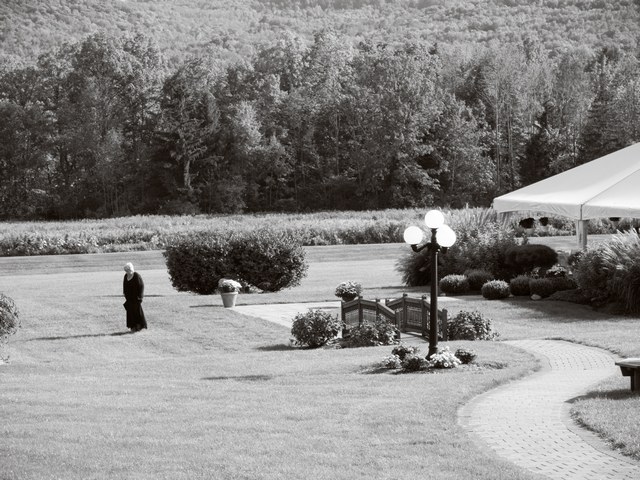
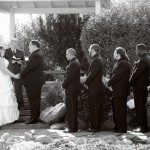
This was not a true “pure” test of the compact camera versus the professional DSLR. I was limited in various ways due to the presence of the other two photographers and my ruse of trying to appear as just another wedding guest (I even had a “story” of how I knew the wedding couple in case any of the other guests asked…:-). On the other side, it certainly helped to have a wedding during the day, outside under a tent where the light is pretty good. I would have struggled much more with a compact camera in a dark church.

I guess the main message for me is that it *is* possible to get nice wedding images with a compact camera–even in the role of a “guest”. The important thing is for the photographer to really know what s/he is doing–having lots of experience shooting weddings and/or other events helps a lot!–and for the photographer to really know the strengths and weaknesses of the camera they’re using.

Also, I would be remiss if I didn’t mention one other thing: knowing how to process images (in something like Adobe Lightroom or Photoshop) can make a *huge* difference in the final appearance of your images regardless of your camera equipment. What makes a wedding image look like a “wedding image”? A significant part of this “look” is the post-event image processing.

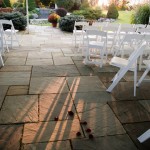
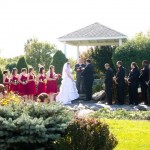
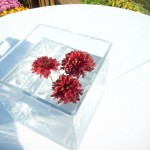
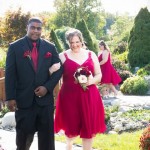
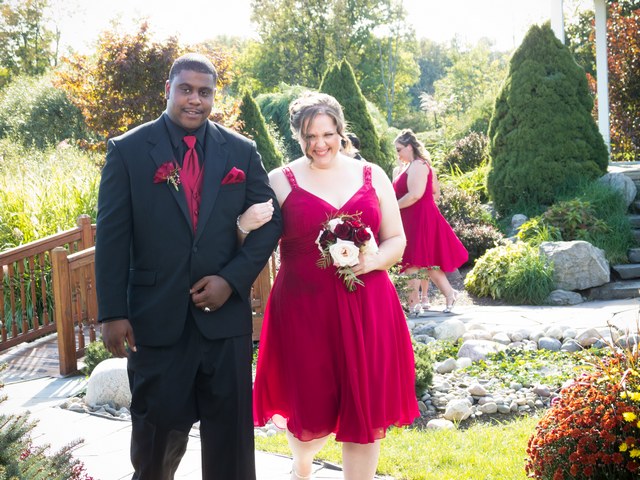
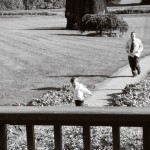
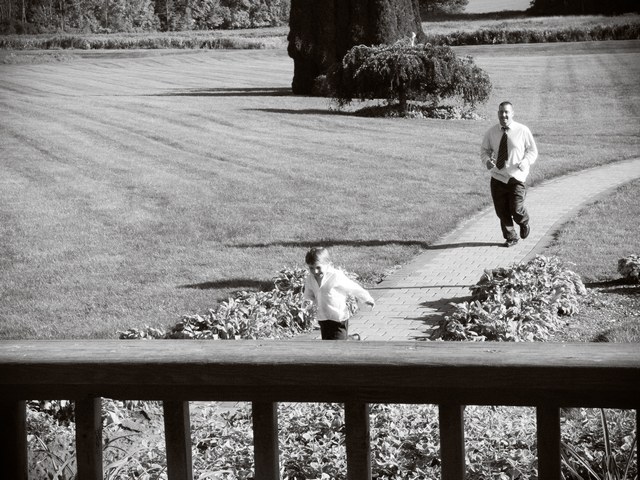
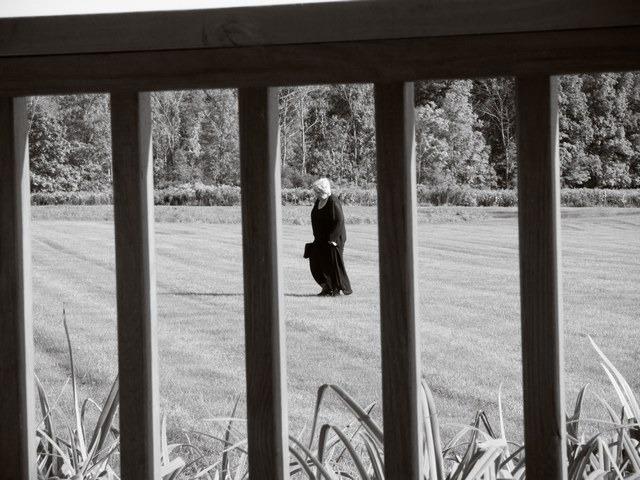
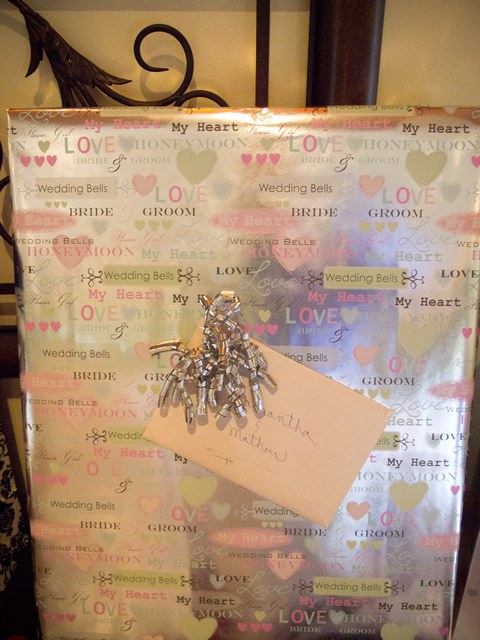
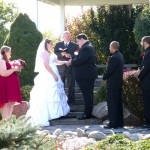
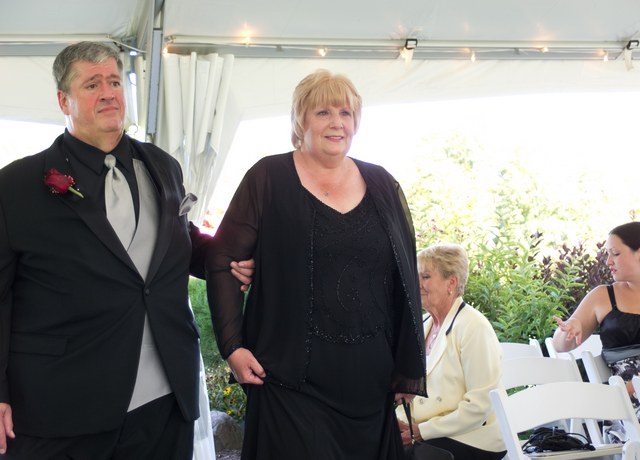
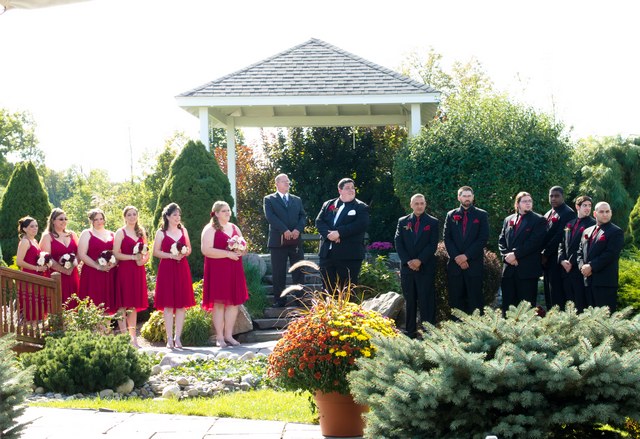
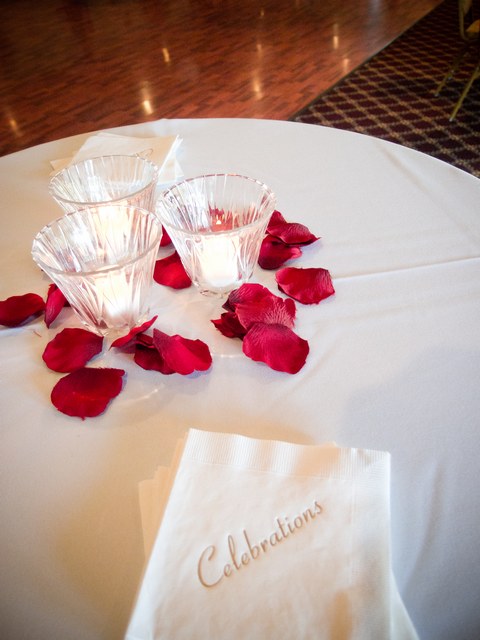
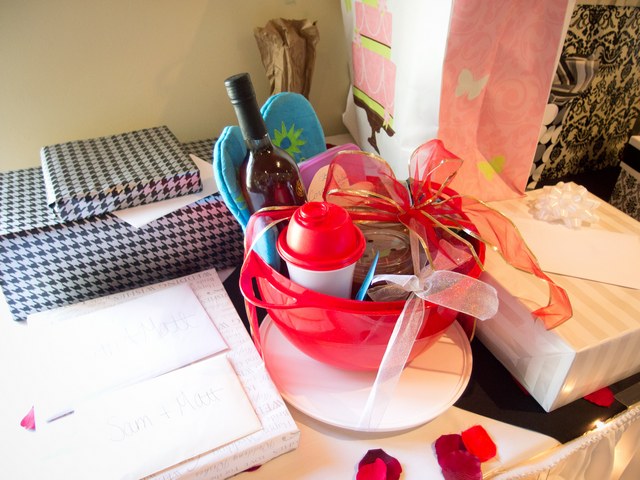
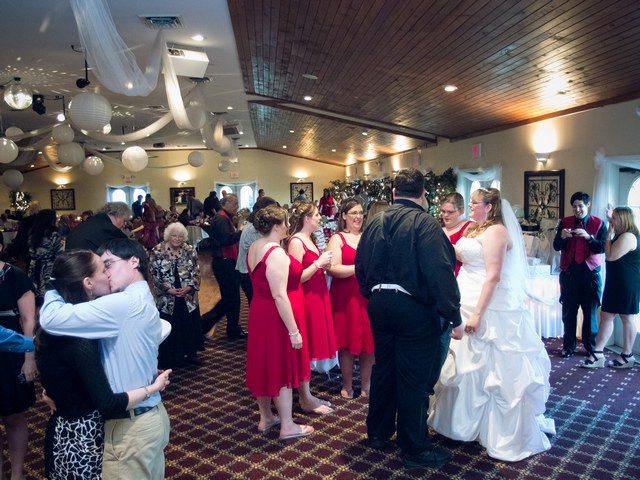
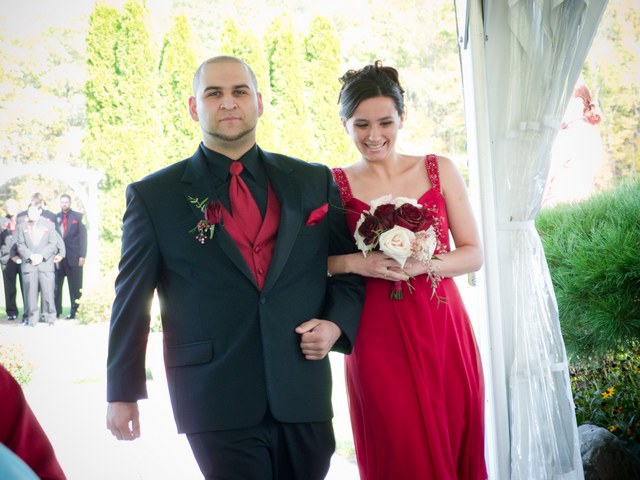
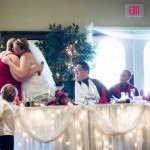
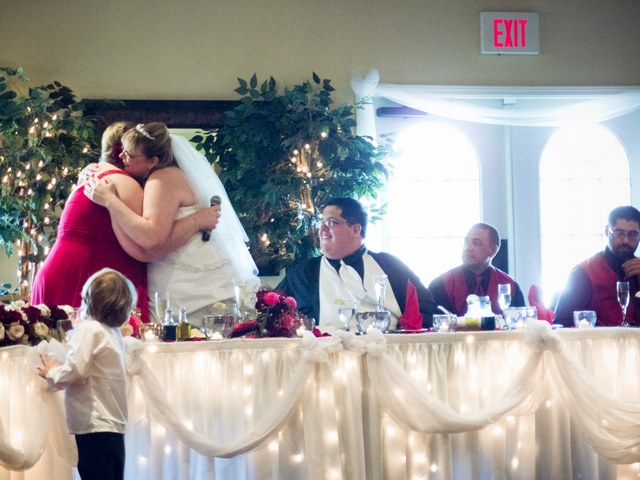
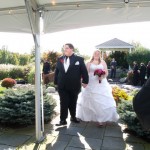
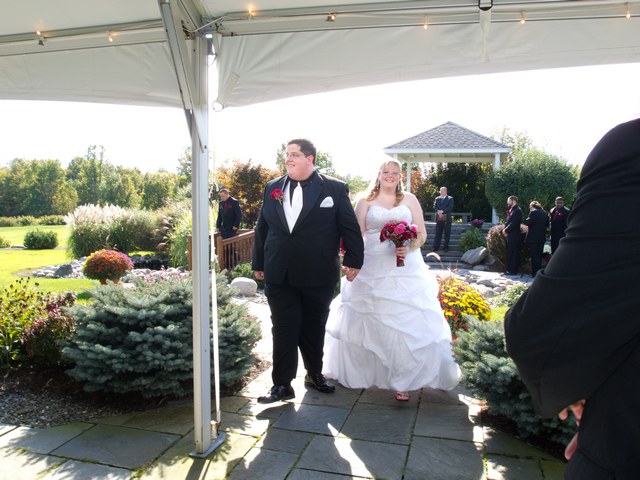
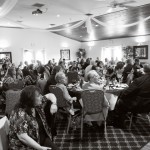
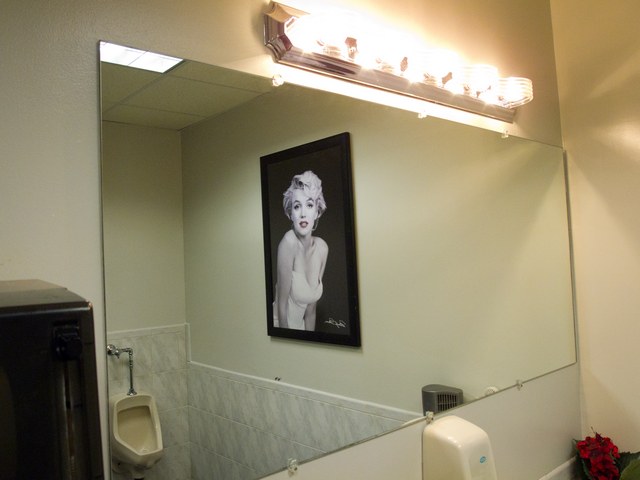
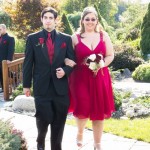
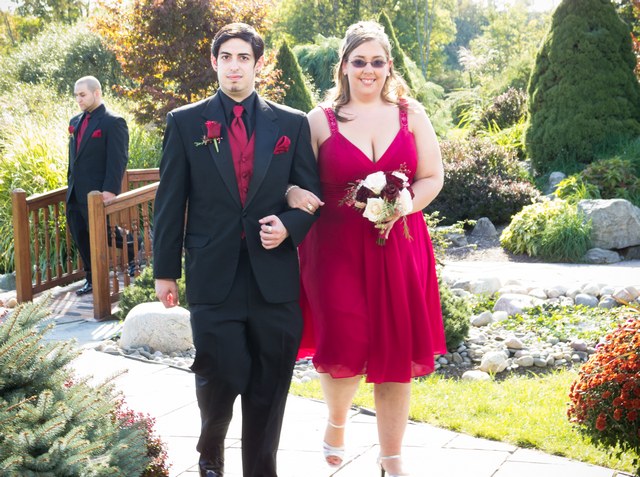
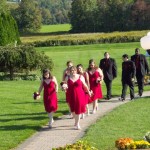
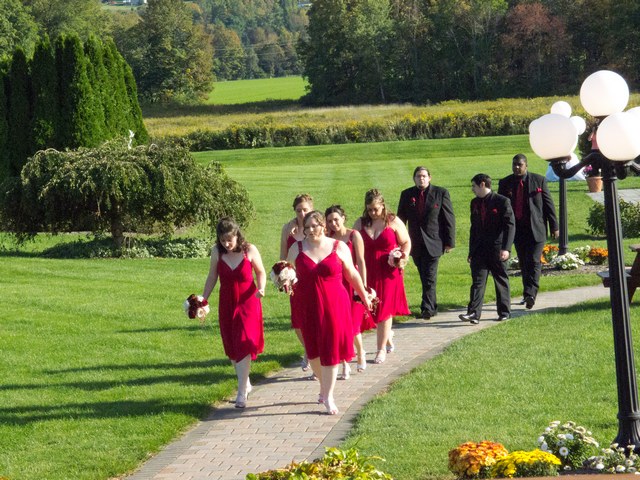
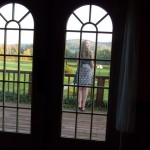
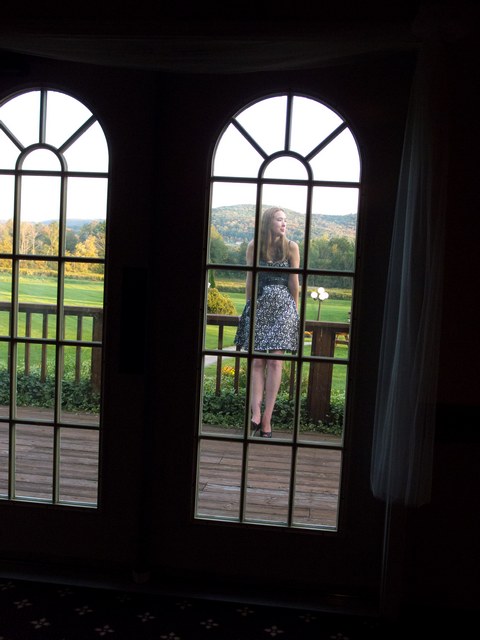
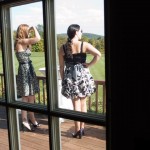
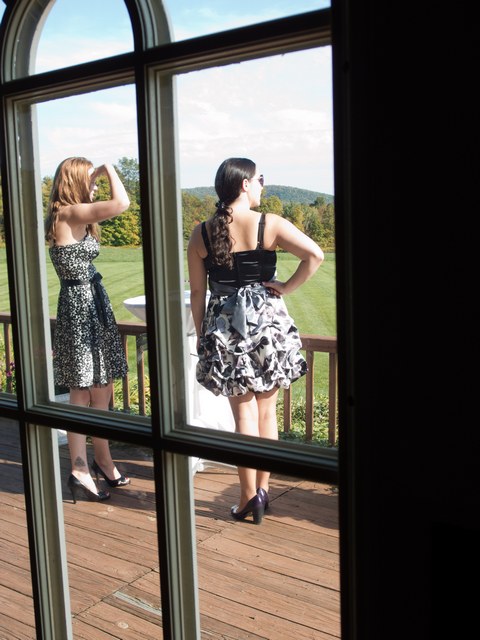
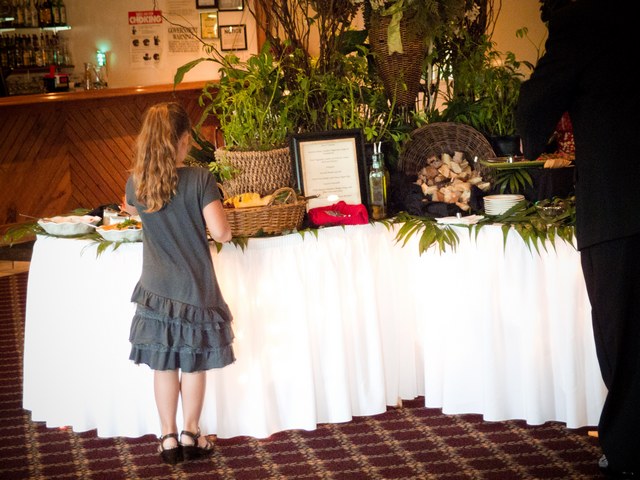
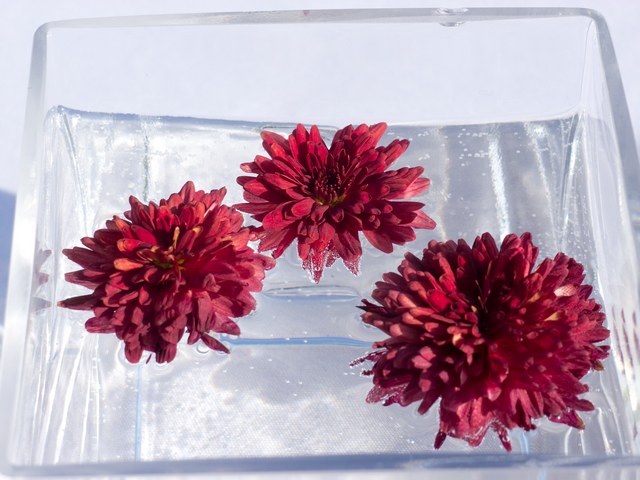
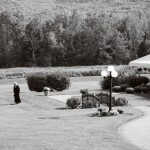
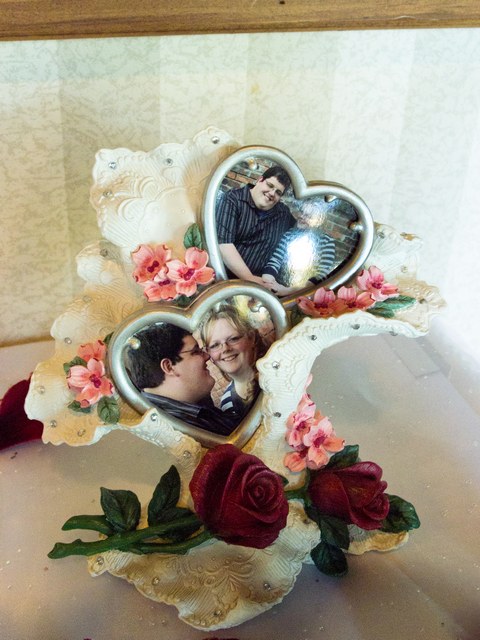
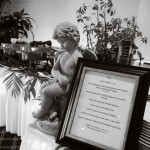
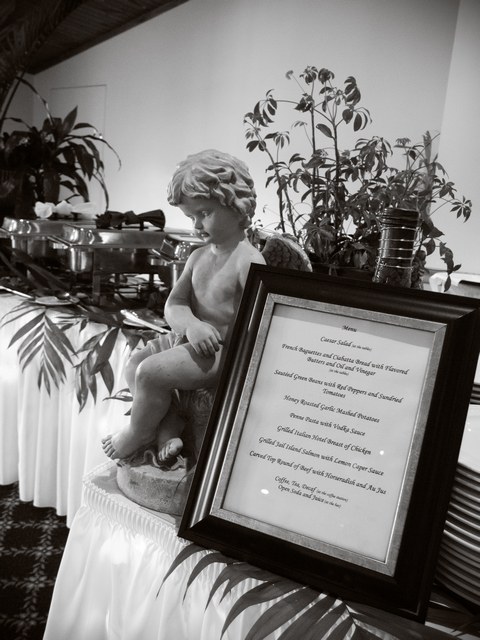
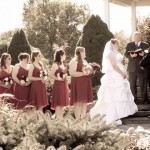
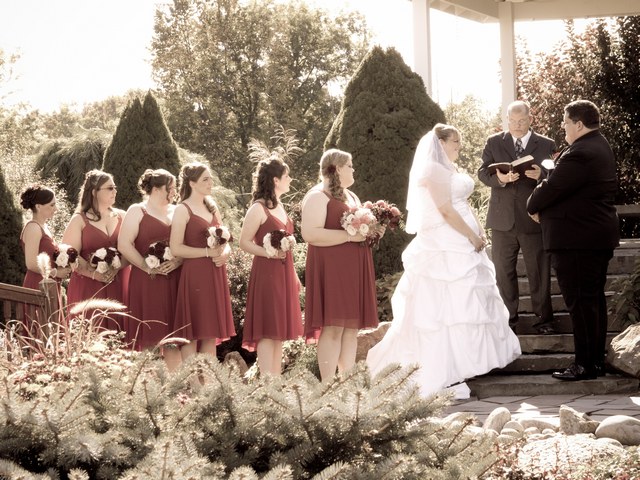
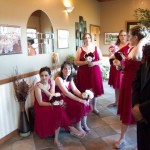
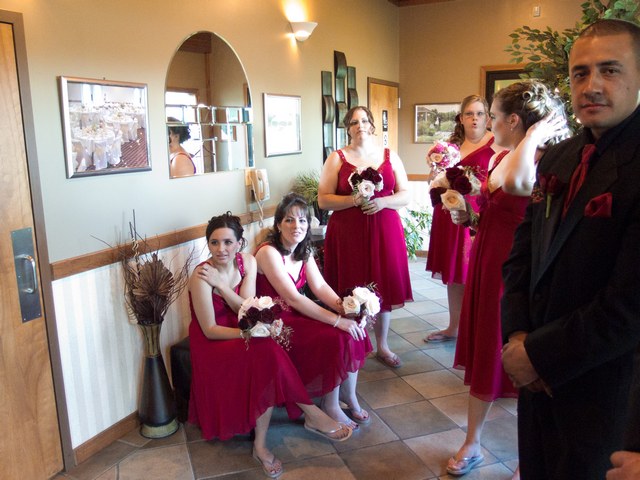
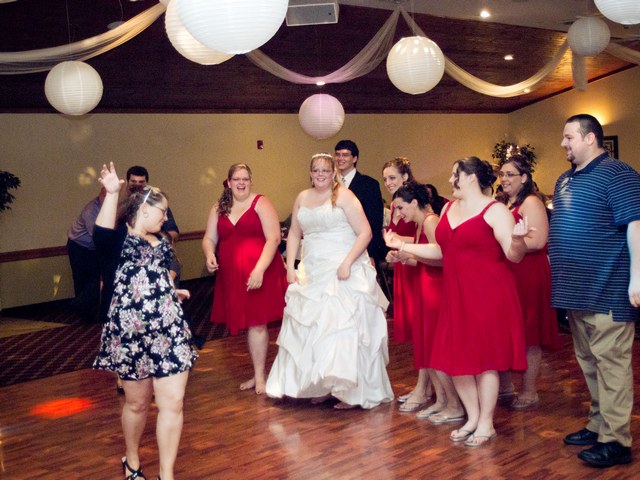
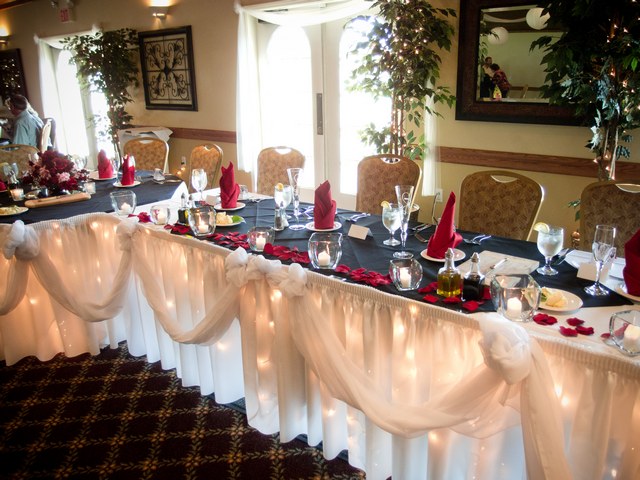
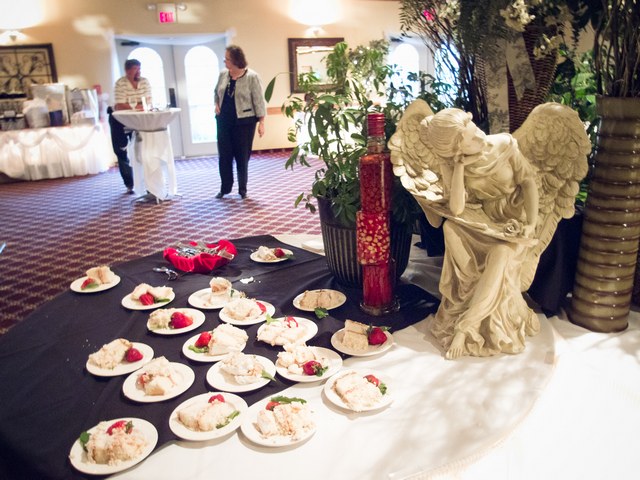
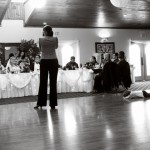
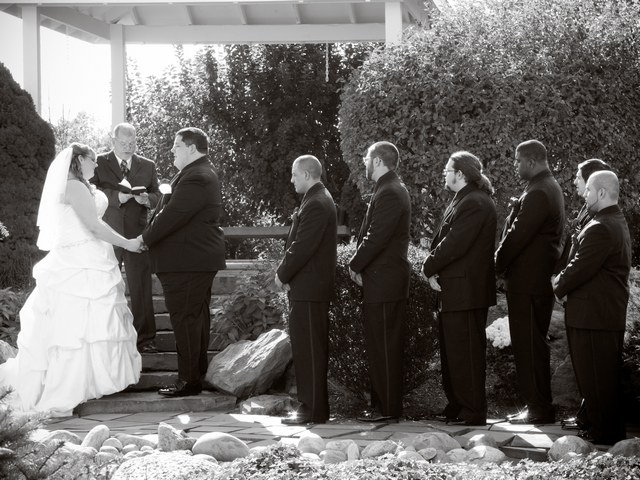
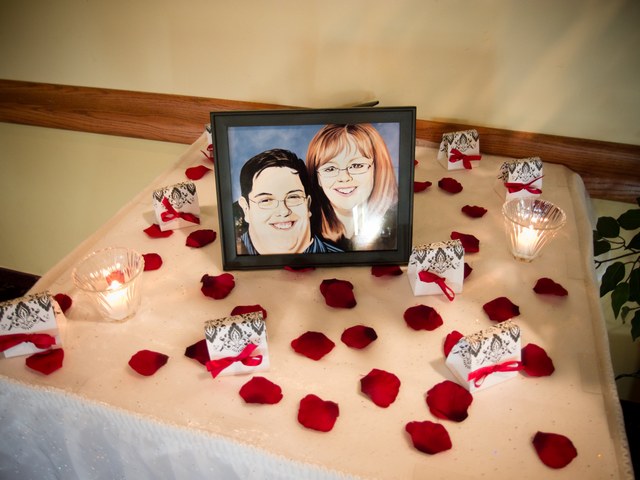
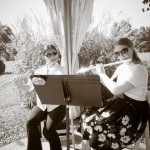
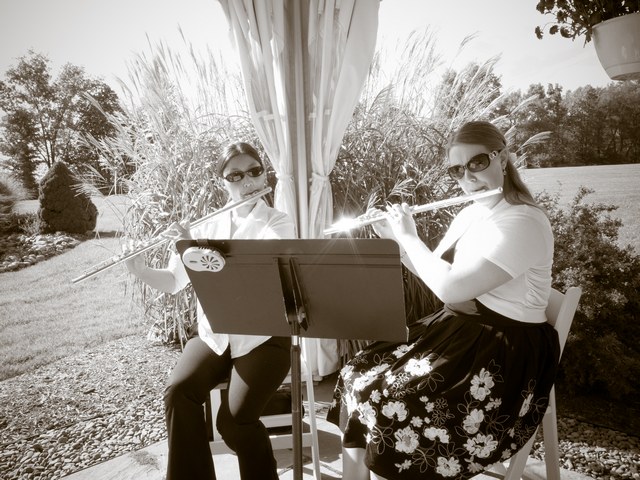
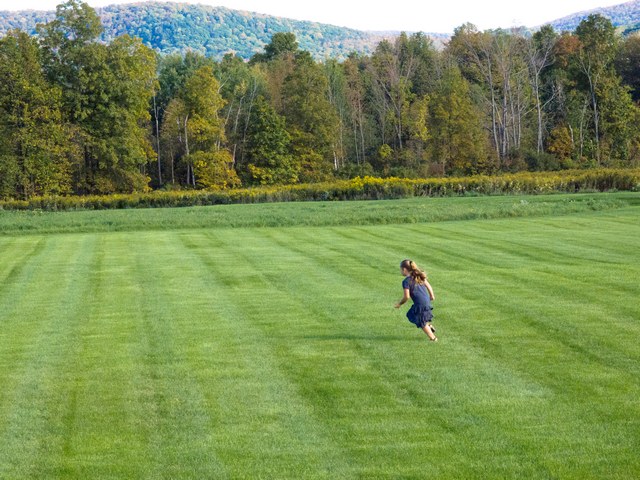
Below, you can see a bunch of the wedding images I took with my point-and-shoot at the wedding and decide for yourself how “successful” the experiment was..!

Point-and-Shoot Wedding

Point-and-Shoot Wedding

Point-and-Shoot Wedding

Point-and-Shoot Wedding

Point-and-Shoot Wedding

Point-and-Shoot Wedding

Point-and-Shoot Wedding

Point-and-Shoot Wedding

Point-and-Shoot Wedding

Point-and-Shoot Wedding

Point-and-Shoot Wedding

Point-and-Shoot Wedding

Point-and-Shoot Wedding

Point-and-Shoot Wedding

Point-and-Shoot Wedding

Point-and-Shoot Wedding

Point-and-Shoot Wedding

Point-and-Shoot Wedding

Point-and-Shoot Wedding

Point-and-Shoot Wedding

Point-and-Shoot Wedding

Point-and-Shoot Wedding

Point-and-Shoot Wedding

Point-and-Shoot Wedding

Point-and-Shoot Wedding


Visit Michael's Art Photography Portfolio at SaatchiArt.com!

Fashion Show Photography: Even more lessons learned

19 Monday Apr 2010

Posted by mgm in All, Commentary, Fashion/Glamour, MGM's Photos

≈ 1 Comment

Tags

fashion, glamor, photography

Share
2010 Fashion Show Photo

70-200 f/2.8 lens, f/2.8, 500 ISO, 1/400 sec

So I shot my annual fashion show…the one I’ve been doing the past 5 years. It’s always in early Spring, so I tend to use it as a warm-up for wedding and portrait season, and also to test new equipment. I titled this post “Even *more* lessons learned” because I’ve blogged about fashion photography lessons learned in a previous post.

Honestly, my favorite part is capturing back stage candids (my *next* blog post will feature my back stage photos and lessons, so stay tuned…). Photographing the show is mostly a matter of workin’ the equipment: bam, bam, bam! Sure, this machine-like gun operation of my camera and lenses is a relatively good way to see what the equipment can and cannot do, but it’s not particularly creative. That said, I do tend to look for something other than the straight on, one model filling the frame types of shots; it makes it more interesting for me.

Anyway, this year I decided to shoot the whole show (well, OK, I was only there until the first intermission) with one lens and one camera. In previous years, I’ve shot with two cameras, one connected to a 24-70 zoom lens and the other to a 70-200 zoom lens, and stood about 8 feet away from the end of the runway (i.e., quite near it) with 20 other photographers.

My plan this year was to stand further back on a small step ladder with my 70-200 f/2.8 IS lens attached to my new Canon 1D Mark IV that I wanted to test out. I placed the ladder adjacent to the corner of the stage where in years past, the models came for their final poses before returning back up the runway.

2010 Fashion Show Photo

70-200 f/2.8 lens, f/2.8, 500 ISO, 1/400 sec

Unfortunately, the show organizers decided to switch things up; they decided to have models end up at the “other” corner of the stage before returning back up the runway. I, of course, didn’t realize this until the show started and I saw what was happening.

So, lesson learned: talk to fashion show organizers each year about the planned “traffic pattern” on the catwalk because it may not stay the same from year to year. It’s not always easy to find a fashion show representative who actually knows this sort of information; but it’s worth the effort. Also, if you see a designated show videographer in some optimal, cushy location near the stage or on an elevated platform, you can be pretty sure *he’ll* know!

2010 Fashion Show Photo

70-200 f/2.8 lens, f/2.8, 1600 ISO, 1/400 sec

Anyway, I didn’t want to stay at the transition corner; I wanted to be at the final posing corner. So I moved my step ladder in the aisle toward the other stage corner. Well, wouldn’t you know that someone in the audience was pretty darned annoyed at where I was standing on my ladder and told me so.

Because I didn’t really want to be yet another annoying photographer getting in everyone’s way, I crouched down the rest of the show (well, the rest of the first half of the show) and took many photos of the models on the stage with audience heads creeping up ever-so-slightly into the bottom part of the photos, sometimes obscuring the model’s feet. This wasn’t optimal, obviously, but some of the designers and models still bought my photos; so it wasn’t a total wash.

2010 Fashion Show Photo

70-200 f/2.8 lens, f/3.2, 2000 ISO, 1/400 sec

What worked and what would I do differently next time?

First, I still like standing back further from the stage–than the other 20-30 photographers taking close-ups of the models right *at* the stage–and using one camera and one long telephoto lens (for me, the 70-200 f/2.8 IS). This allows me to more easily get photos of the models almost anywhere on the stage and they don’t all of to be close-ups. I noticed one photographer was sharing the stand the videographer was on, which was in a perfect location of my one telephoto lens strategy. I’ll have to do some sucking up to the videographer next year…:p.

Compared to last year, instead of shooting in manual exposure mode with a fixed ISO, I shot using auto ISO. The lighting on the runway is quite uneven; so a fixed manual exposure doesn’t work too well, unless you’re only taking photos at the end of the runway. Even then, there are differences depending on where the model is standing. I’ve noticed when I’m shooting with a longer lens, the camera does a better job with exposure because no one part of the scene–which may be quite a bit darker or lighter than the rest of the scene (this commonly happens when the model is wearing white or black clothing or has particularly pale or dark skin)–dominates the frame as it does when you’re close up.

2010 Fashion Show Photo

70-200 f/2.8 lens, f/2.8, 1600 ISO, 1/400 sec

I should explain a little more about my camera setting: I was using a Canon 1D Mark IV, which allows you to put the camera in manual mode, but with the ISO set to Auto. The great thing about this is that you can put the aperture and shutter speed at some fixed settings (e.g., f/3.2 and 1/400 sec) and let the camera adjust exposure by raising or lowering the ISO. In effect, it’s like you’re able to shoot in both aperture priority and shutter priority simultaneously. I found that keeping the aperture relatively large (f/2.8 – f/3.5,  mostly to keep the ISO from going too high) and the shutter speed relatively high (1/200-1/400 sec, especially when photographing the models *while* they moved down the runway) worked out quite well.

2010 Fashion Show Photo

70-200 f/2.8 lens, f/3.2, 640 ISO, 1/400 sec

If I didn’t have a camera that does auto ISO in manual mode, I’d probably shoot in aperture priority mode and keep the shutter near it’s max…again, if I’m using a relatively long/telephoto lens.

That’s it for now. My next blog post (within the next week) will feature my back stage photos and lessons. In the meantime, I’ll finish this post with a few more shots of the show (click on the thumbnails to see them larger).


Visit Michael's Art Photography Portfolio at SaatchiArt.com!

Photographing Fashion Shows – Lessons Learned

09 Thursday Apr 2009

Posted by mgm in All, Commentary, Fashion/Glamour, MGM's Photos

≈ 14 Comments

Tags

fashion, glamor, photography

Share

Canon 1DS Mark II, 24-70 f/2.8L, f/5.6, 1/60 sec,
manual exposure, 200 ISO

Over the past four years, I’ve been photographing the fashion show put on by the Cornell Design League (CDL) at Cornell University early each Spring. This is always a “dead” time of the year for photography up here in the Northeast, so I do it as a warmup and chance to test new equipment for my weddings and portrait sessions that begin in earnest in May.

Neither the CDL nor Cornell University pays me anything up front to photograph the event, but I often make *some* money from print sales to designers, models, and their relatives, and digital sales to media organizations, like the Cornell Chronicle.

After photographing four years of shows, I’ve learned a bit about what works and doesn’t work when it comes to fashion show photography.

Backstage
Before the show even begins, I like to go backstage and take “getting ready” photos. Much like the “getting ready” photos I often take during the weddings I photograph, these are candid photos of the emotional and
sometimes quirky things that go on before the “big event”. I find them to be more interesting than photographing the event itself, because it’s all unstaged. However, there are commonly special challenges presented during this phase.

Canon 5D, 70-200 f/2.8L IS, f/2.8, 1/80 sec,
aperture priority, 1250 ISO

CDL Backstage

Canon 5D, 70-200 f/2.8L IS, f/2.8, 1/100 sec,
aperture priority, 1250 ISO
CDL Backstage

Canon 5D, 70-200 f/2.8L IS, f/2.8, 1/60 sec,
aperture priority, 1600 ISO


The Cornell fashion show takes place in a large gymnasium-type building with lights 25 feet up near the high ceiling. Even when these are on–they turn them off 45 minutes or so before the show–it’s pretty dark back behind the main stage where everyone is getting ready. Some of the designers bring their own lights because it’s so dark. Needless to say, the lighting is usually insufficient and uneven. And I resist using my flash because it destroys the ambience and candidness of the moment.

Canon 5D, 70-200 f/2.8L IS, f/2.8, 1/50 sec,
aperture priority, 1600 ISO
Canon 5D, 70-200 f/2.8L IS, f/2.8, 1/250 sec,
aperture priority, 1600 ISO

So, commonly, I’m pushing the limits of my equipment. It’s not uncommon for me to have to open my aperture to its maximum setting of f/2.8 and dial the ISO up to 3200. Even then, the shutter speed for proper exposure can be 1/30, which is pretty slow, even with Image Stabilization (IS). So, the biggest challenge is getting them sharp! A monopod wouldn’t be a bad idea; I usually just steady and brace myself and take 2-3 shots in a row and keep the best one.

CDL Backstage

Canon 5D, 70-200 f/2.8L IS, f/2.8, 1/100 sec,
aperture priority, 1600 ISO
CDL Backstage

Canon 5D, 70-200 f/2.8L IS, f/2.8, 1/400 sec,
aperture priority, 3200 ISO
Canon 5D, 70-200 f/2.8L IS, f/2.8, 1/25 sec,
aperture priority, 3200 ISO

Show Time – Finding and Securing a Position
Though I haven’t been good about this myself, it’s really a good idea to get to the runway/cat walk early to check out different positions to take before the show starts…and then *reserve* the best spot you can find. I haven’t tried this, but I bet I could put an official-looking sign that says something like: “Reserved for Show Photographer” on the best seat near the stage to keep anyone from sitting there. If that’s not possible, you could bring someone and have them sit there until the show starts and then move to let you in. All this assumes “open seating” and will vary from fashion show to fashion show. It also wouldn’t hurt to talk to the show organizers and see if they might reserve a spot for you.

In any case, you’ll want a relatively central spot near the end of the runway. Personally, I like being slightly off-center because I find a slight angle to be more interesting than straight-on shots. Also, you probably don’t want to be right *at* the stage, if that’s even possible. If you’re right at the stage/runway, you’ll have to use a small aperture and wide angle focus length, which is a bad combination in terms of perspective/distortion, shutter speed, and depth of focus. It’s best to be 4 feet or more back and use a normal or telephoto lens. More on lenses next…

CDL Backstage

Canon 5D, 70-200 f/2.8L IS, f/3.5, 1/60 sec,
manual exposure, 250 ISO
CDL Backstage

Canon 1DS Mark II, 24-70 f/2.8L, f/5.6, 1/80 sec,
manual exposure, 250 ISO

Cameras and Lenses
The last two years, I’ve brought two cameras with me and put a standard zoom (24-70mm or 24-105mm) on one camera and a telephoto zoom (70-200mm or 80-200mm) on the other. I then catch some shots as they first start down the runway with the telephoto lens, and then switch to the standard zoom for the posed shots at the end of the runway. (Tip: be sure to time synch the cameras just before the show so that all the images from both cameras are easily time sequenced afterward.) In the two previous years I shot with one camera connected to a 80-200 f/2.8L lens, a 1.6 crop factor DSLR, and positioned myself well back from the end of the runway. I think the ideal one camera + lens combo would be a 70-200mm lens on a full-frame DSLR and then position yourself within 10 feet of the runway. 70mm on a full-frame camera isn’t so far from a normal (50mm) perspective, and you still have the 200mm to catch them at the beginning of their stroll. If I photograph the show again next year, I think I’ll try this latter one camera configuration. Even though it’s nice to get some of the wide angle shots afforded by the 24-70 on a full-frame camera, I’d be able to get at least 85% of the shots I’d want with only one camera and lens.

Canon 1DS Mark II, 24-70 f/2.8L, f/6.3, 1/80 sec,
manual exposure, 250 ISO

Lighting
The lighting at fashion shows is reasonably good because, presumedly, the designers want the audience to be able to clearly see the clothes they designed! Due to this fact and my fear of annoying everyone around me with my flash, I seldom use flash at a fashion show. Sometimes, however, there are dark areas near the end of the runway that the lighting setup people have missed. If you experience this situation at a fashion show and you have brought two cameras, you can attach the flash to the camera with the standard zoom (e.g., 24-70) and use it only when the models step into the dark area/s when they get near you at the end of the runway.

Canon 1DS Mark II, 24-70 f/2.8L, f/4.0, 1/80 sec,
manual exposure, 200 ISO

Uneven Lighting
Even if the lighting is sufficient to keep your camera’s ISO settings below 800, it can vary along the runway. Also, occasionally they will allow different designers to incorporate different lighting effects into their presentations. This can wreak havoc with your exposures if you’re using a manual exposure setting! So, let’s talk about camera settings…

Camera Settings
Even though I was using shutter speeds of 1/60 and 1/80 sec this last show (I wasn’t thinking straight because I was coming down with a cold), I advise using shutter speeds of 1/200 sec or faster….especially when catching them during their long walk down the runway. They’ll be moving–sometimes running and dancing!–and you want some nice sharp detail. Your aperture for the distant shots when they first start down the runway can be quite large–e.g., f/4.0 or even f/2.8 is not usually problematic. But once they get close to you (like within 10 feet), you’ll want f/6.3 or f/5.6. If you’re using two cameras, the one with the telephoto lens can have the larger aperture and the other one should have the relatively small aperture. If you’re shooting with only one camera, you would be well advised to go with the smaller aperture (f/6.3 or f/5.6) and leave it there.

CDL Backstage

Canon 1DS Mark II, 24-70 f/2.8L, f/6.3, 1/80 sec,
manual exposure, 250 ISO
CDL Backstage

Canon 5D, 70-200 f/2.8L IS, f/3.5, 1/60 sec,
manual exposure, 250 ISO

The biggest question to me in terms of camera setting is which camera mode to use..? The last two years, I’ve photographed the show in manual exposure mode. The goal was to reduce the amount of image processing needed after the show. However, I’ve run into two problems that have undermined this goal: 1) the uneven lighting along the runway means I get darker and lighter photos depending on the variation in light, and 2) I occasionally bump either the shutter or aperture setting and end up with bad exposures.

The main reason for #2 is, I believe, because I’m using two cameras and all those camera switches end up in accidental alterations of settings (due to jostling). I could solve this problem by using only one camera, or putting tape over the controls that keep getting bumped to help keep them in place. The only solution for problem #1 (short of changing the manual settings *as* they walk down the runway!) is to switch to either aperture-priority or shutter-priority mode. So, why don’t I just do that?

CDL Backstage

Canon 1DS Mark II, 24-70 f/2.8L, f/5.6, 1/50 sec,
manual exposure, 200 ISO
CDL Backstage

Canon 5D, 70-200 f/2.8L IS, f/3.2, 1/60 sec,
manual exposure, 160 ISO

I photographed the first two years of fashion shows in aperture priority. But when a model walks out in a pure white or dark black outfit, the exposure the camera calculates automatically can be seriously off! Using shutter-priority makes a lot of sense in some ways–because you know you want to maintain a relatively high shutter speed–but the camera is still calculating the exposure and can be as far off as aperture priority mode. Of course you can also play around with the type of metering the camera is doing (spot, partial, average, etc), but I’ve found that all of them are off in *some* situations.

Unless the lighting varies a *lot*, I think I still prefer manual exposure for the best overall results. But shoot in raw format to best allow for exposure adjustments in post-processing. Also, if you are shooting with two cameras, you can optimize the one with the telephoto lens for the lighting at the beginning and/or middle of the runway, and the other camera with the standard/normal lens for the lighting at the end of the runway.

Canon 1DS Mark II, 24-70 f/2.8L, f/3.5, 1/40 sec,
manual exposure, 3200 ISO


So those are my tips and “lessons learned”. I hope they help you should you too come across the opportunity to shoot a fashion show. Fashion shows can definitely be interesting and a lot of fun!..:-).


Visit Michael's Art Photography Portfolio at SaatchiArt.com!

Newer posts →

MGM’s Twitter Feed

Subscribe to this blog!

 Subscribe via your own reader

Hosted by:

Recent Posts

  • My Latest Photos and Tweets
  • Fall Fashion (Oct 2019) by Michael Grace-Martin
  • Smithsonian Center for American Art, Washington DC (July 2016)
  • The Great New York State Fair, Syracuse, NY (Sept 2016)
  • 2016 Ithaca Festival Parade
Easy way to support this site: Buy Toilet Paper!

Proudly powered by WordPress Theme: Chateau by Ignacio Ricci.